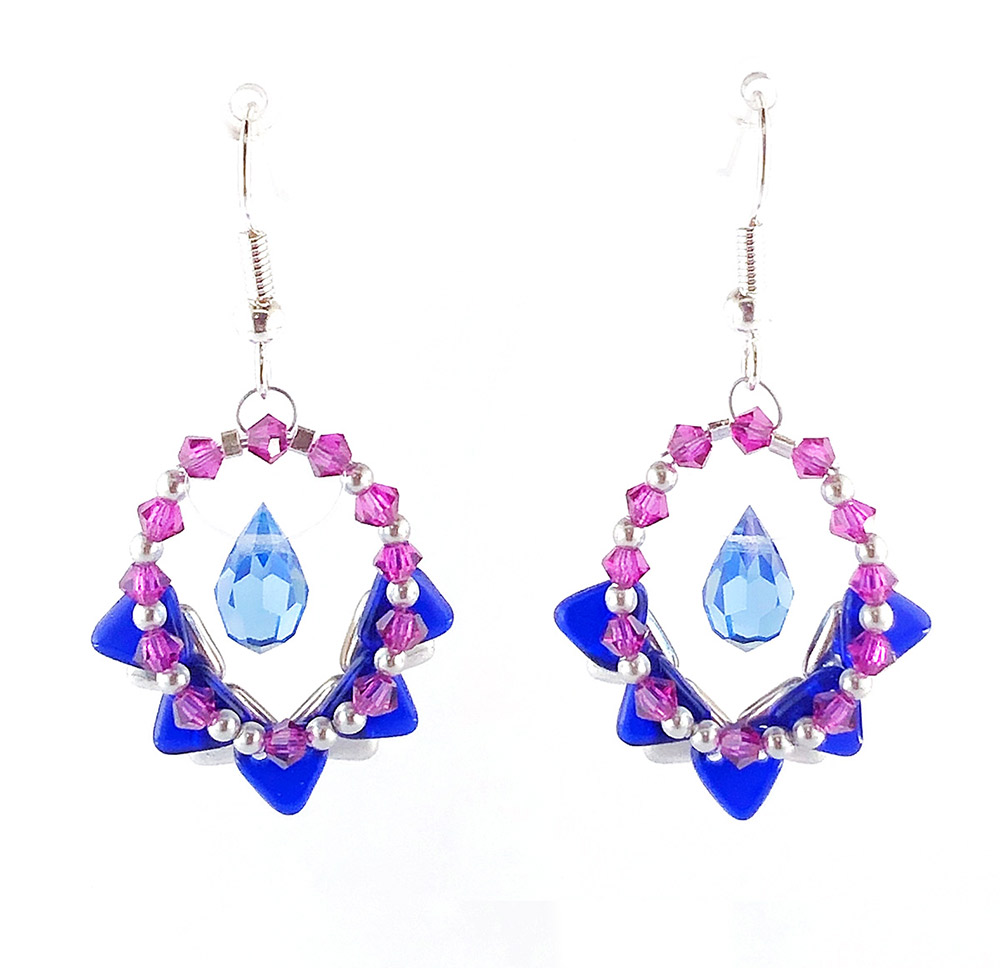
These Framed Drop Earrings combine simple bead weaving with basic stringing – a great small project to try out different techniques.
Materials required
10 x 2 hole triangles (colour 1) transparent blue have been used in the example.
9 x 2 hole triangles (colour 2) bright silver have been used in the example
24 x 3mm Preciosa Crystal bicone beads fuchsia have been used in the example
24 x 2mm Czech glass pearl beads light grey have been used in the example
2 x 6mm x 10mm Preciosa drop pendants sapphire have been used in the example
approx. 60cm x beading thread – 4oz FireLine works well
approx. 30cm x SoftTouch fine flexible wire
approx. 20cm x 0.25mm Supplemax (illusion) thread
4 x size 1 crimp tubes silver plated
2 x fishhooks silver plated
Step 1
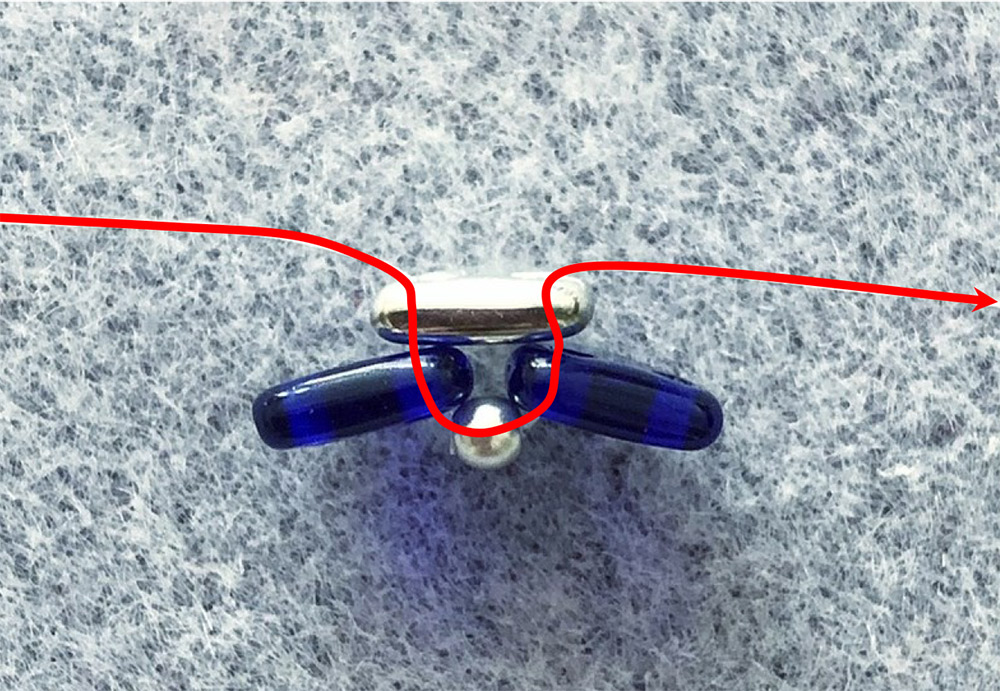
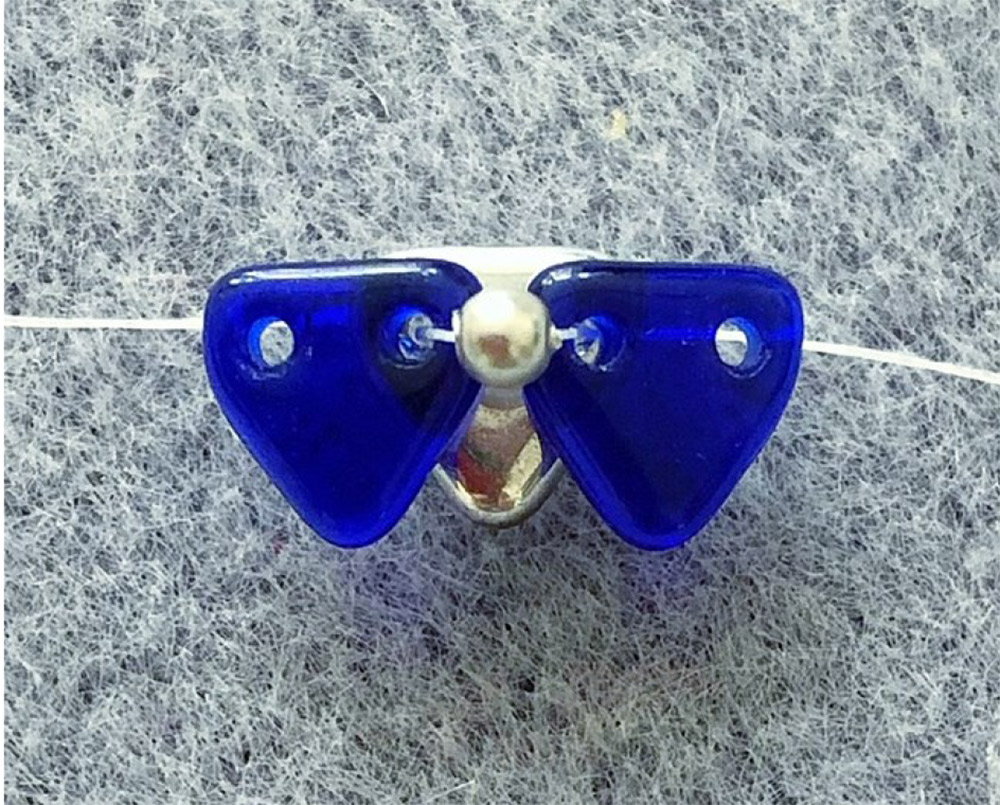
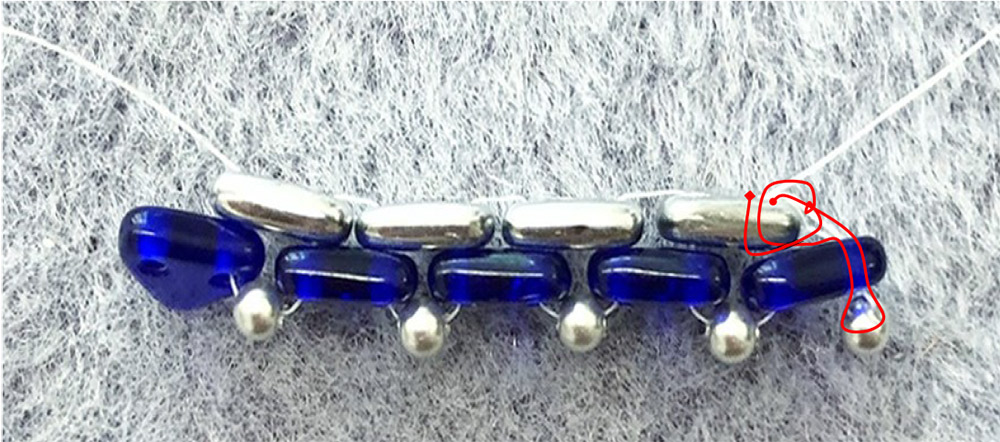
Bead weaving – Using approx. 30cm of your chosen beading thread. During this project hold the 2 hole triangle beads so that the flat face is towards you and the point is facing downwards. Leave a tail of thread approximately 8cm. Thread on a colour 2 triangle (silver in the image), through the left hole from the back. Then thread on a colour 1 triangle bead (blue), through the right hole from the back. Pick up a 2mm pearl bead. Thread through a new colour 1 triangle bead, through the left hole from the front, followed by the right hole of the existing colour 2 triangle bead set behind the other beads.
The first image shows the thread path, the second image shows how the beads look when viewed from the front.
Step 2
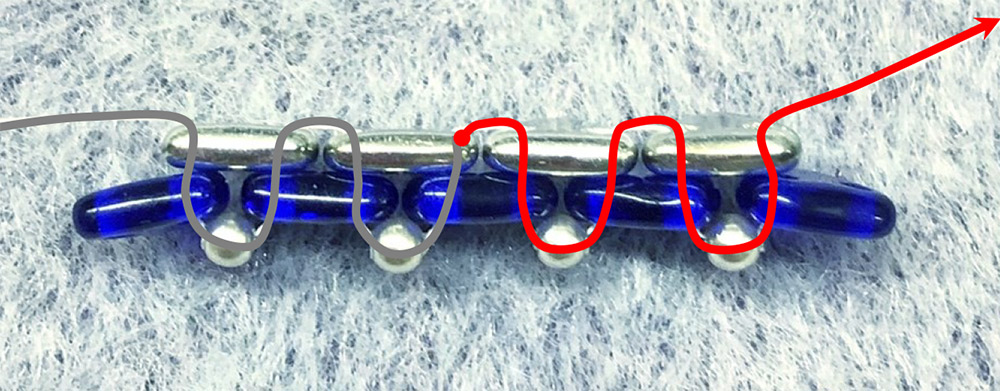
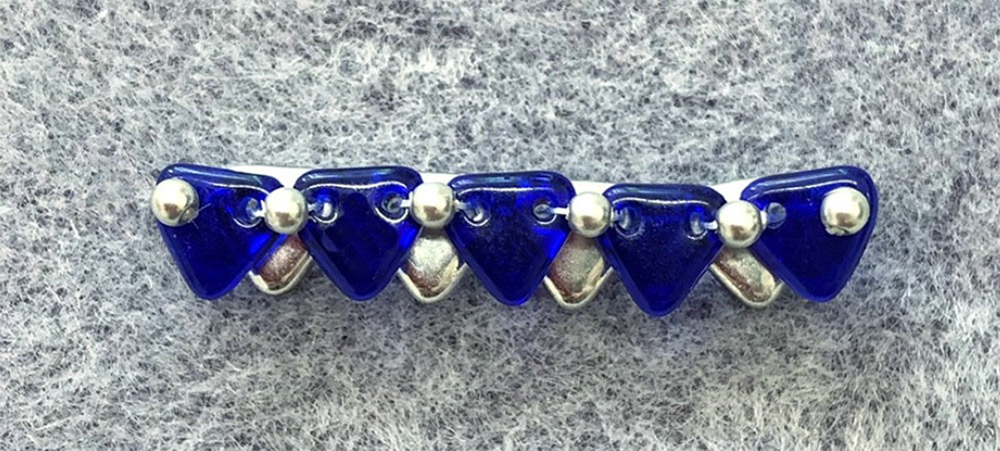
Pick up a colour 2 triangle bead and thread through the left hole from the back, then through the right hole of the colour 1 bead in front (right hole). Pick up a 2mm pearl followed by a new colour 1 triangle bead through the left hole from the front (first image).
Repeat step 2 twice more, until you have 5 colour 1 triangles in front and 4 colour 2 triangles at the back (second image).

Step 3
Keeping your tension tight so that the triangle beads are quite snug next to one another. Thread through the last (right) hole on the colour 1 triangle from the back. Pick up one 2mm pearl and thread straight back through the triangle, front to back. Fasten off the end of the thread by going through the colour 2 triangle behind (towards the back) tie a half hitch knot and thread though the same hole again to hide the end of the thread before cutting the excess off. Repeat this using the tail of thread from the beginning to add another 2mm pearl and fasten off the thread. The first image shows the view from the top with one end fastened off and on the second image the front finished. This is the weaving section complete.
Step 4
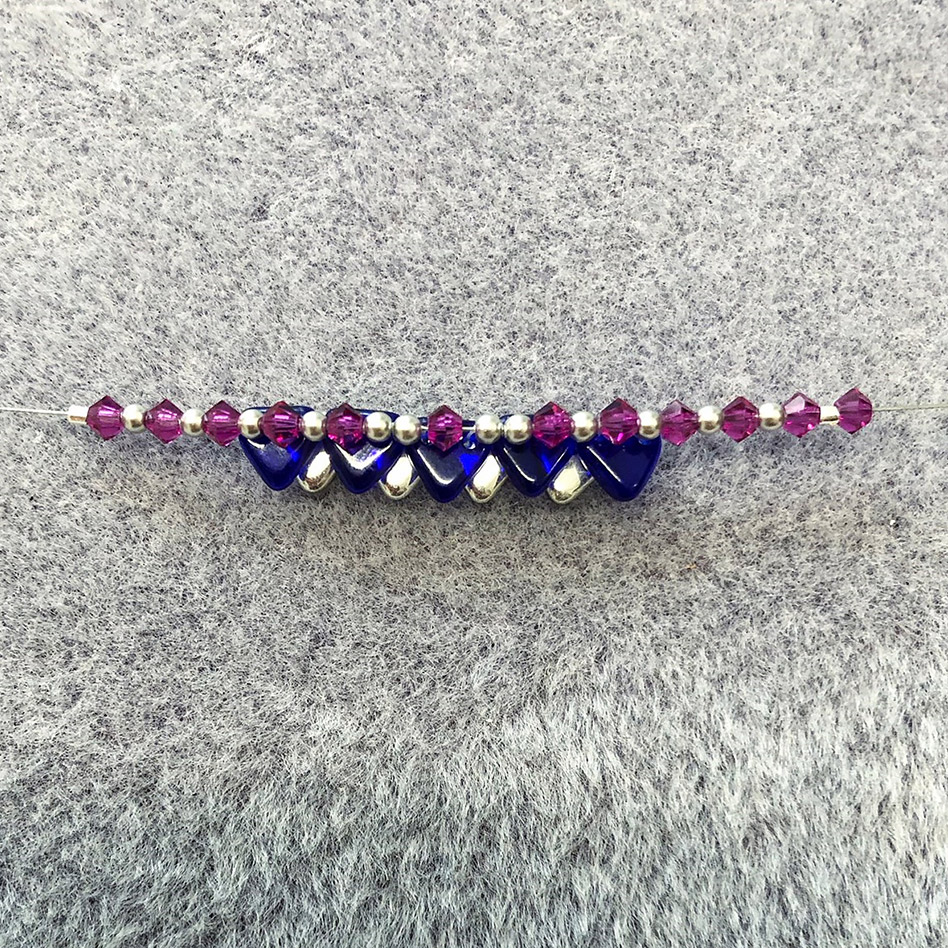
Stringing – Cut an18cm length of fine flexible wire. Working right to left thread on; a 3mm crystal followed by a crimp tube and another 3mm crystal. Thread on a 2mm pearl followed by a 3mm crystal, twice. Now thread though the first 2mm pearl on the right side of the beadwork (with the triangle pointed pointing towards you). Pick up a x 3mm crystal, thread though the next 2mm pearl on the beadwork. Thread on a new 3mm crystal and a new 2mm pearl and thread though the next 2mm pearl. Add a 3mm crystal and thread through the next 2mm pearl (this is the central crystal). Pick up 1 x 2mm pearl and a 3mm crystal, thread through the next 2mm pearl on the bead work. Add a 3mm crystal and thread through the remaining 2mm pearl. Pick up a crystal and a 2mm pearl, twice, followed by another 3mm crystal and 1 crimp tube. (First image)
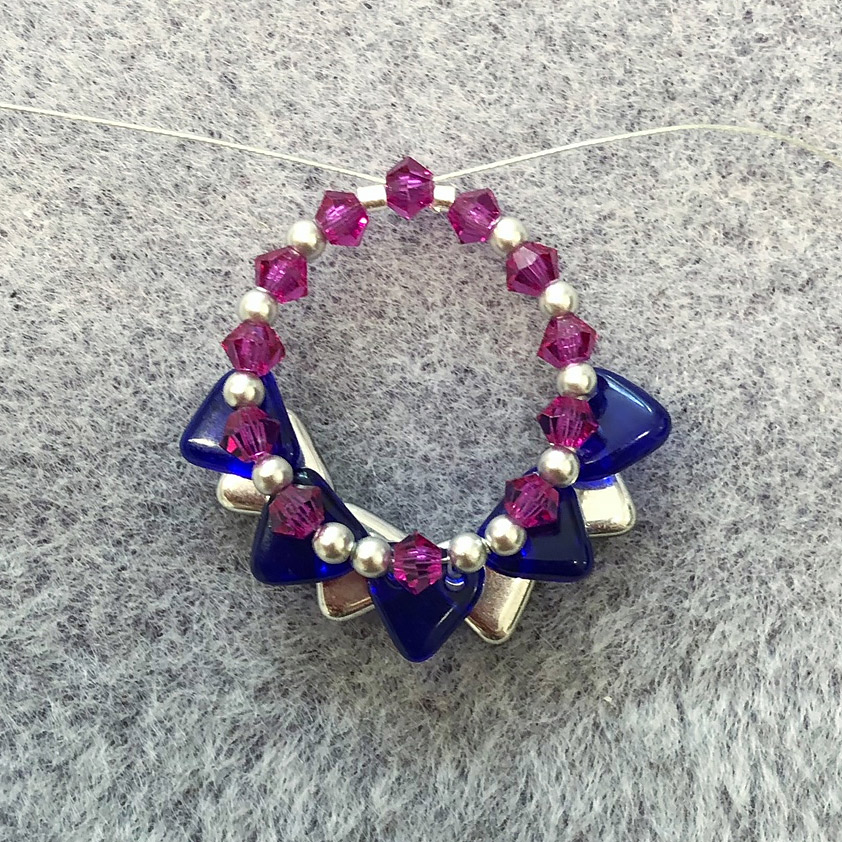
Take the left end off the wire through the first 3mm crystal to create a circle (the ends of the wire will be coming out of opposite sides of the bead). (Second image)
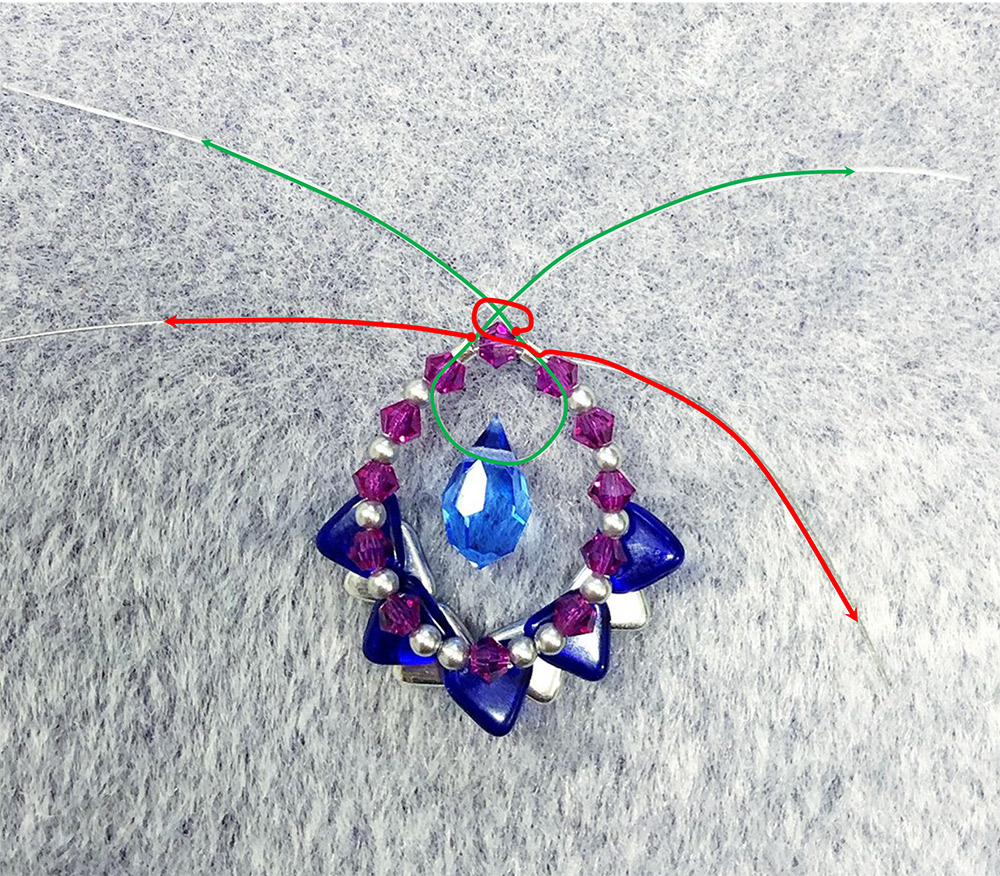
Step 5
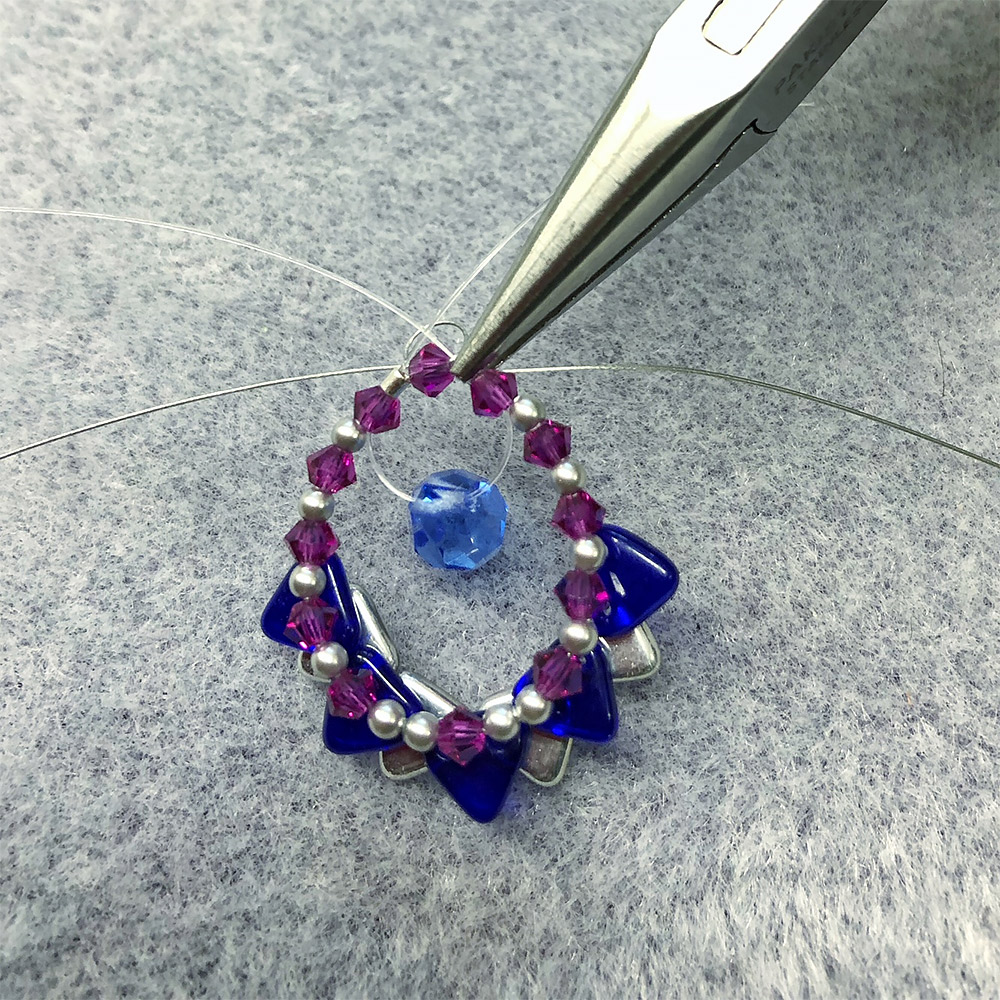
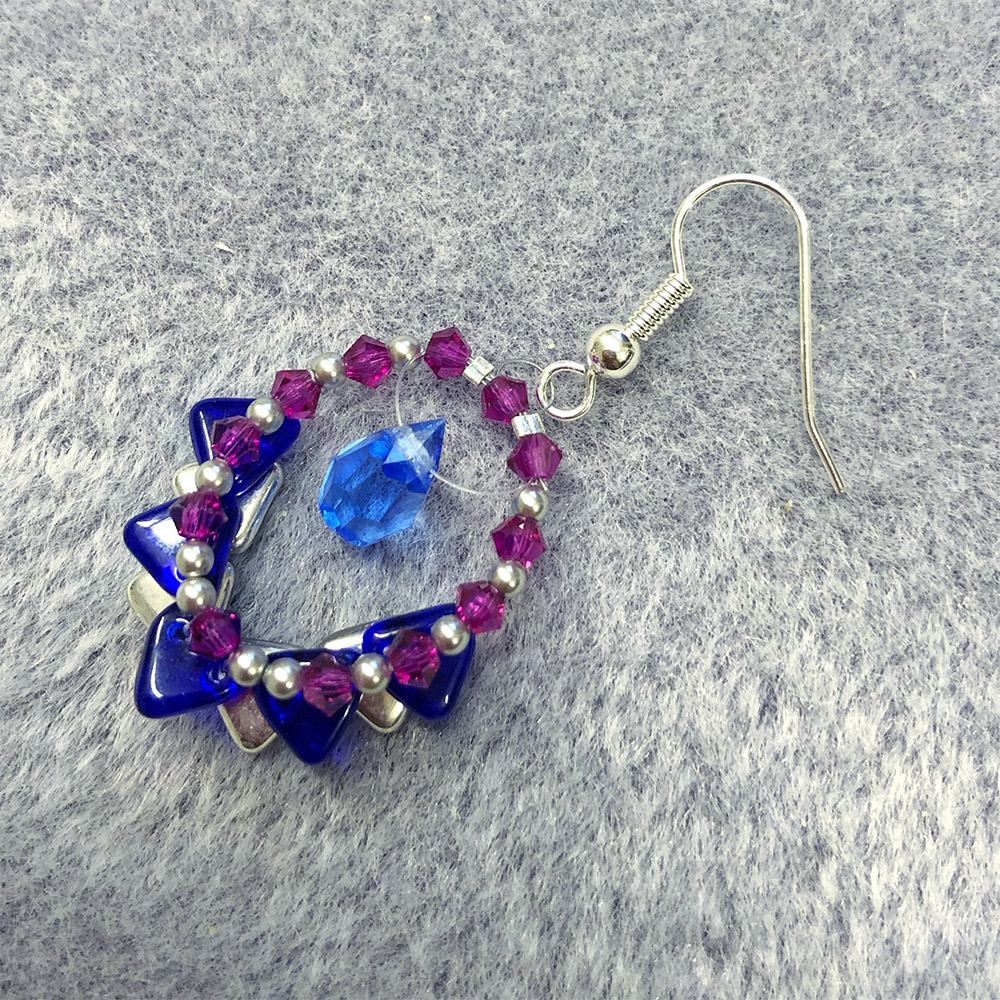
Assembly – Cut a small length of clear thread (approx. 7cm) thread the pendant on and then thread up through the 3mm crystal below the crimp on each side followed by the crimp (green line). Take one end of the flexible wire and thread through the crystal at the top again, creating a small loop, then thread down the following crimp tube too, red line (first image). Tweak all your threads until you are happy with the size of the hanging loop at the top and the position the pendant is in, it looks great suspended in the centre, hold up your earring to double check you’re happy then crimp both crimp tubes on to the wire (second image). Trim off the excess. Attach a fishhook, or your earwire of choice to the hanging loop (third image). Then repeat the whole process to created the second earring. Tip: make sure the second one’s hanging loop & pendant height matches the first one before crimping.
We hope you’ve enjoyed making your framed drop earrings. Do check out all out free resources on our YouTube Channel and our free projects gallery. You can share your makes with us using #TheBeadShopNottingham and tagging us on Instagram and Facebook.