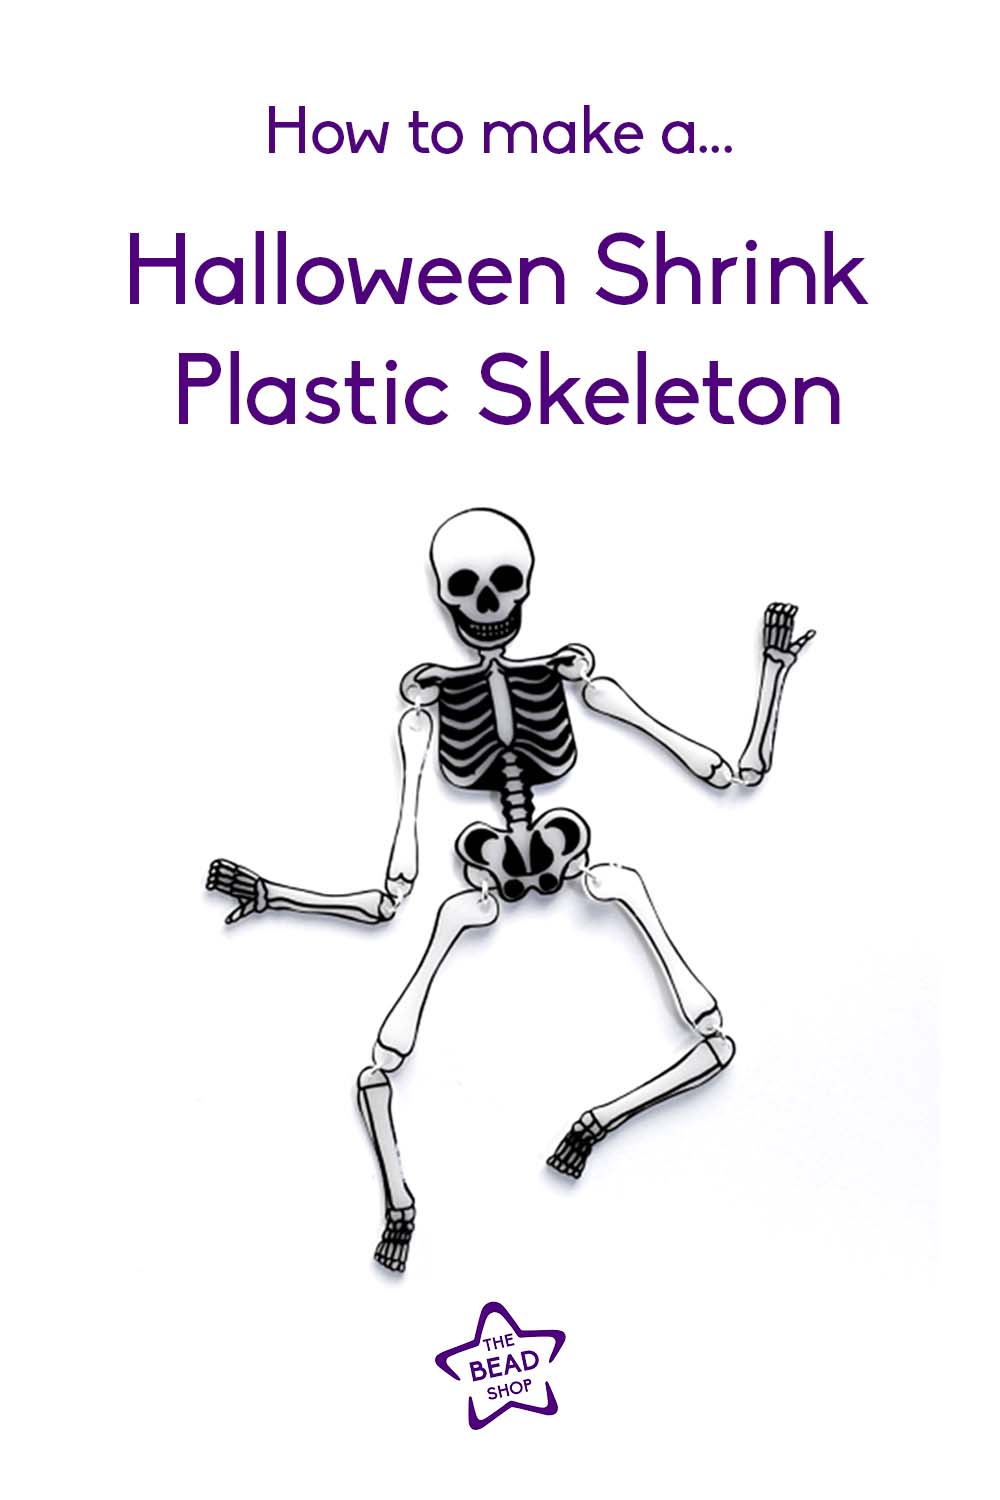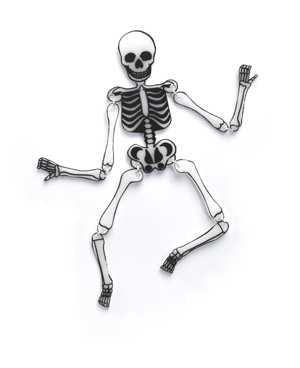
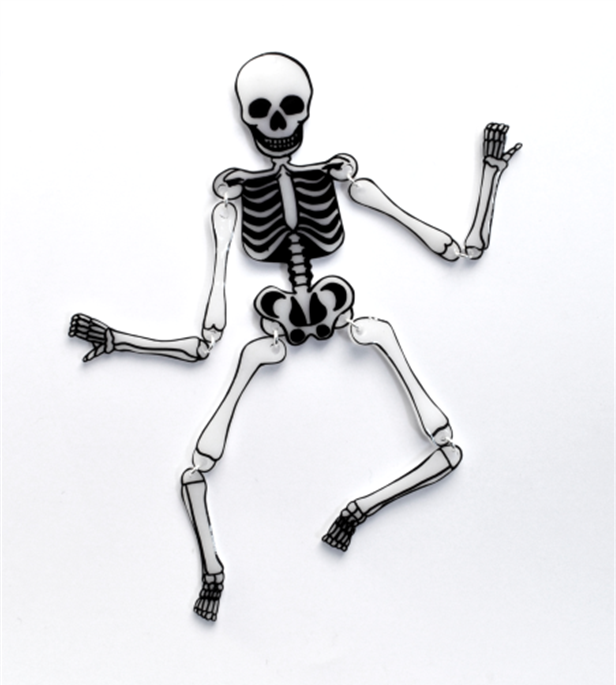
This fun Halloween shrink plastic skeleton design can be adapted to create Halloween decorations or jewellery,
get creative with the moveable joints and you can even make your skeleton dance!
You could hang your finished skeleton from elastic as a decoration so that his limbs will jangle, or why not shrink the image before printing to make a Halloween pendant.
Tools and Materials
- 1 sheet of either white or clear printable shrink plastic
- 8 x 6mm silver plated jump rings
- Hole punch
- Sharp scissors
- Chain nose pliers
- Heat gun or oven
How to make a Halloween Shrink Plastic Skeleton
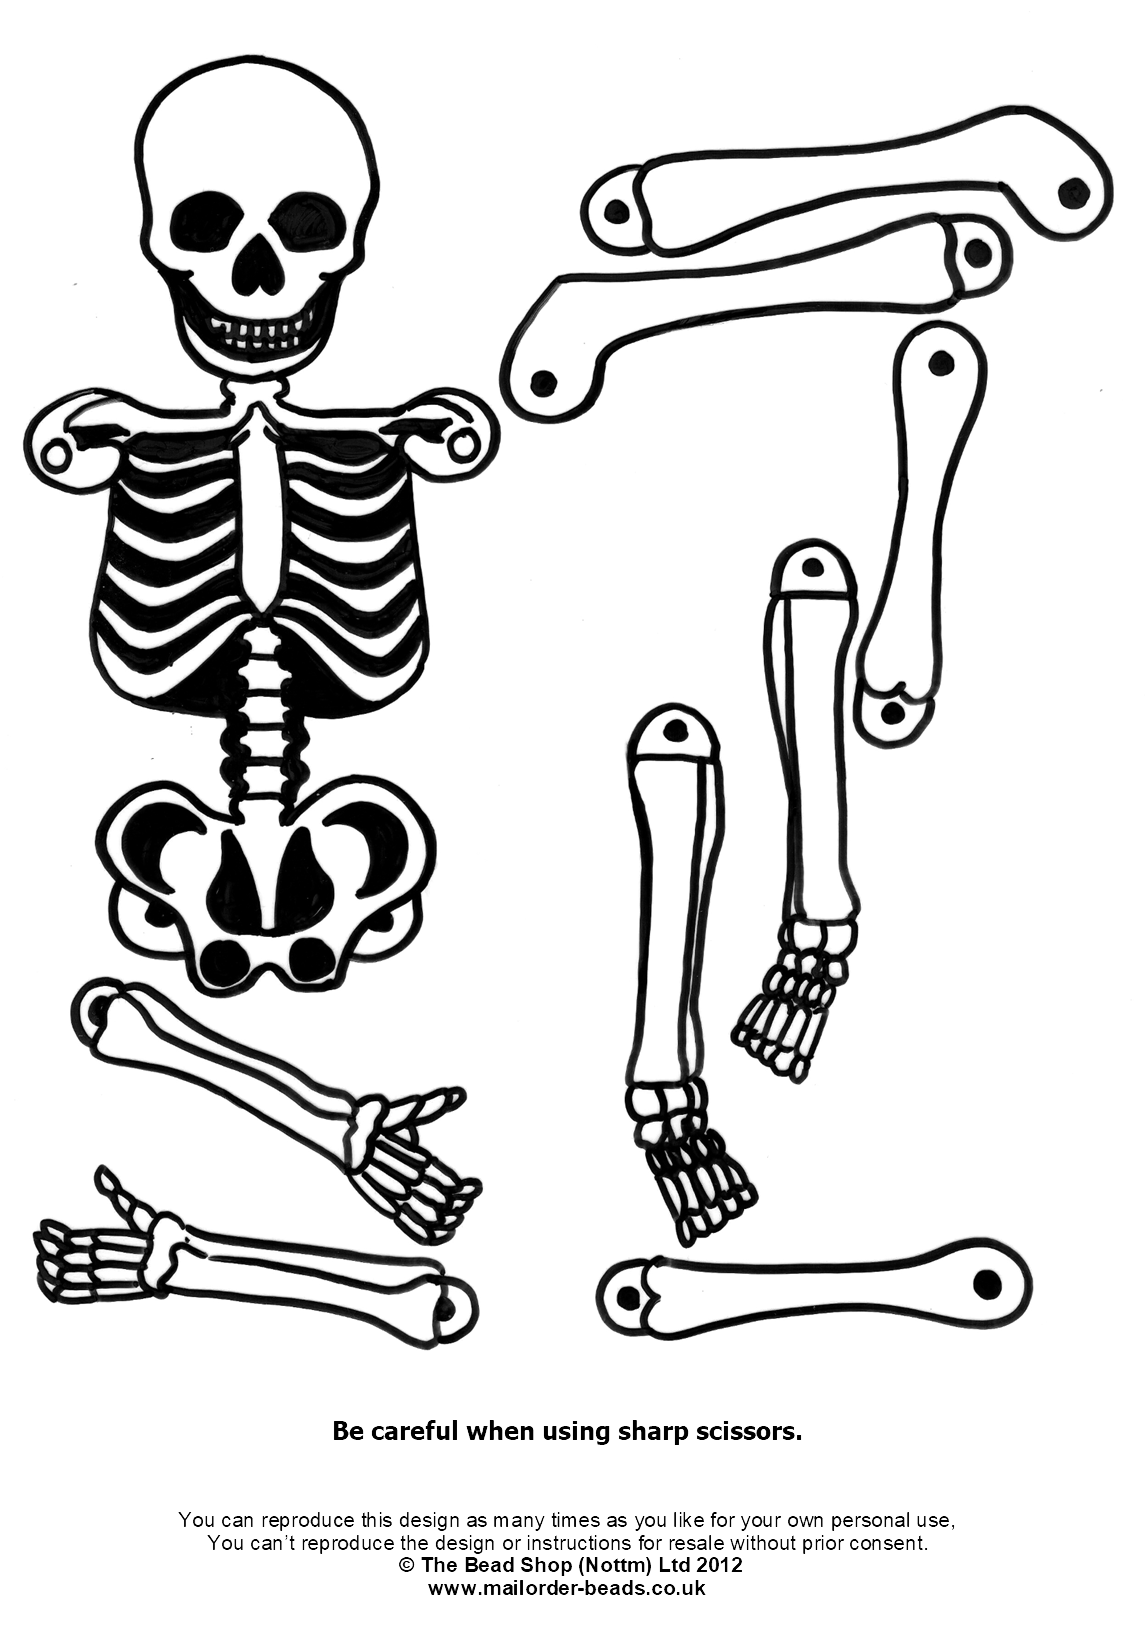
1.Print out the Skeleton Template page on to white or clear printable shrink plastic, we used the clear – to give a translucent milky effect once shrunk, as opposed to being transparent. For printing, the shrink plastic sheets use American sizing, so you would need to set your printer to page size ‘Letter’ and this should print out correctly.
If you do not have a printer, you can trace the design on to normal shrink plastic using a marker pen.

2.Once the skeleton pieces are printed, carefully cut around the edges of all the pieces. Use a hole punch to create holes in each piece where the bones will be links (they are marked with circles).
3.Shrink your skeleton pieces; using either a heat gun and a pair of tweezers, or a baking sheet in the oven, heat up the pieces until they have shrunk down and won’t shrink any further.
TIP: If using a heat gun, be careful not to let the pieces curl up & stick to themselves, the tweezers will be handy to prevent this!
4.Using the skeleton to the right as a guide link all the individual pieces together; twist open a jump ring using chain nose pliers on either side & place the items you want to connect inside & twist the jump ring closed. Make sure you get all the pieces facing the right way.