
This cute Wire Birds Nest Jewellery tutorial shows you how to create wirework bird nests complete with spring coloured ‘egg’ beads that can be easily turned into jewellery. A perfect Easter jewellery DIY!
Difficulty: Beginner
What you will make: Small wire nests with beads that can be added onto a chain to create a necklace
What you will learn: Simple wire-wrapping techniques and how to incorporate beads.
Full step by step instructions below, or download a printable PDF here
Tools and Materials
- 1 x silver plated small round quick link
- 3 x 4mm gem colour SWAROVSKI ELEMENTS 5810 pearls (Ivory, Turquoise and Jade)
- 2m x 0.6mm silver plated wire
- 1 x silver plated curb, snake or trace chain
- 1 x 6mm jump ring (optional)
- Round nose plier and wire cutters

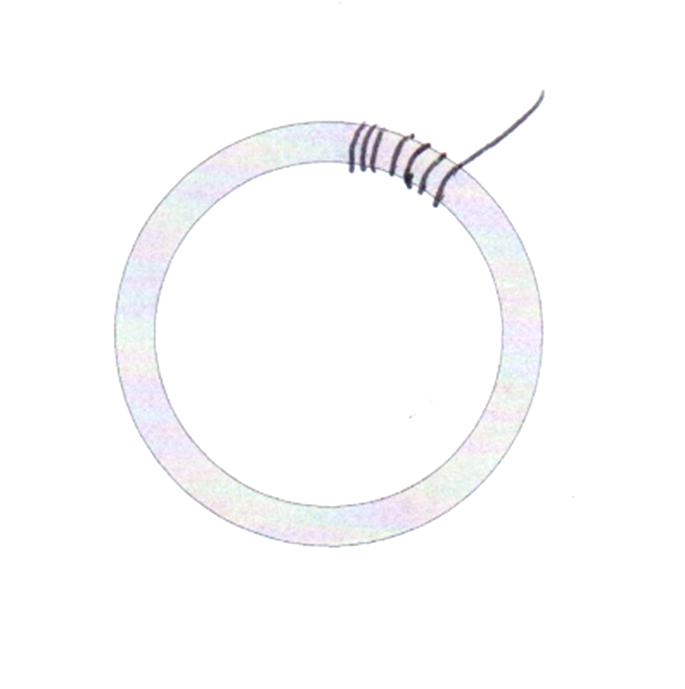
Step 1
Cut a long but manageable, length of 0.6mm silver plated wire and wrap one end tightly around the edge of the small quick link to secure it in place.
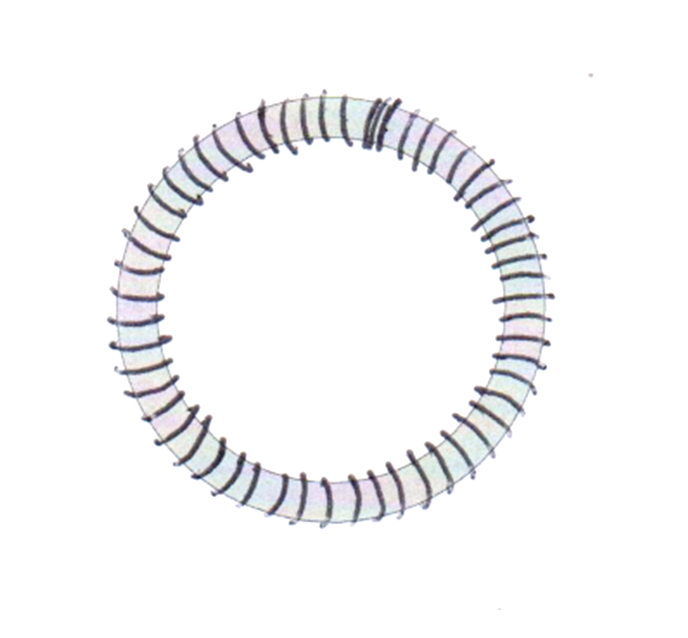
Step 2
Continue to wrap the wire around the link until it is entirely covered.
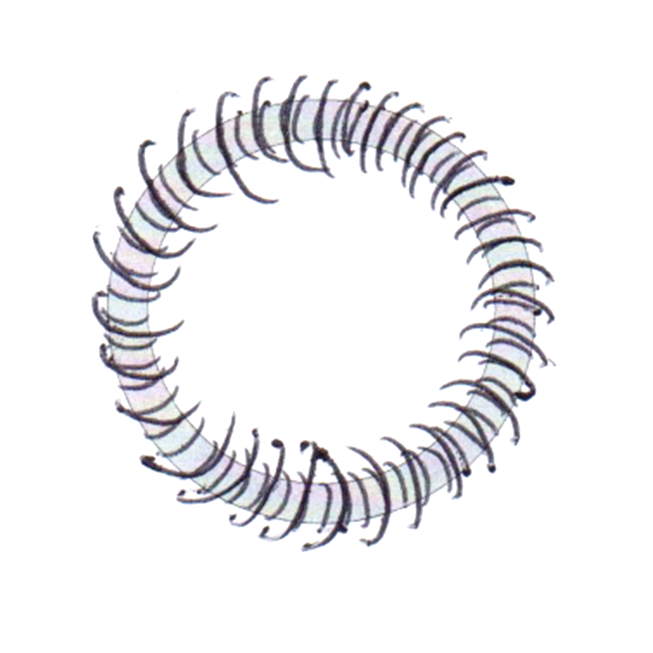
Step 3
Wrap around again & again, until the layers of wire keep building up. At this point you can decide whether to keep the wire looking quite uniform or give it a more organic look.

Step 4
Bring the wire through to the front of the nest, thread one of your 4mm pearls on and continue wrapping as before. Then add the second and third pearls in the same way.
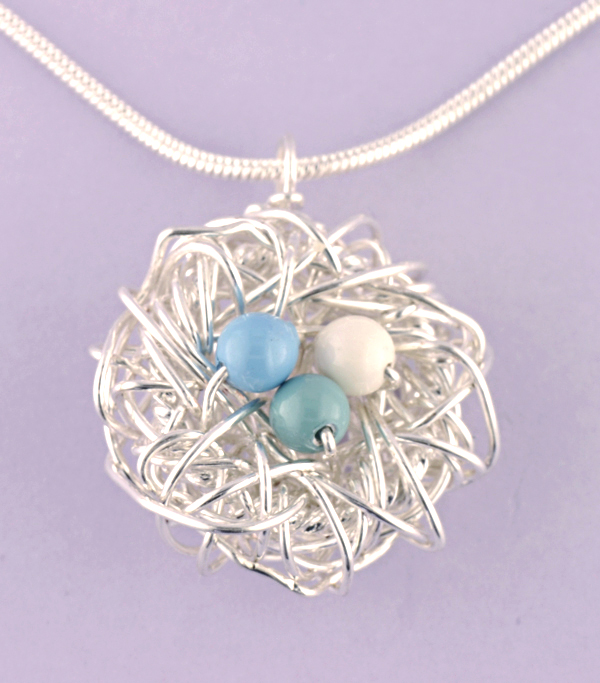
Step 5
If you want to hang your nest as a pendant you can either create a loop from the wire before securing it, or add a 6mm jump ring to make adding to a chain easier. Make sure you tuck in any wire ends so that they can’t scratch you while wearing your mini nest.
Add your pendant to a ready-made curb, trace or snake chain for instant results!
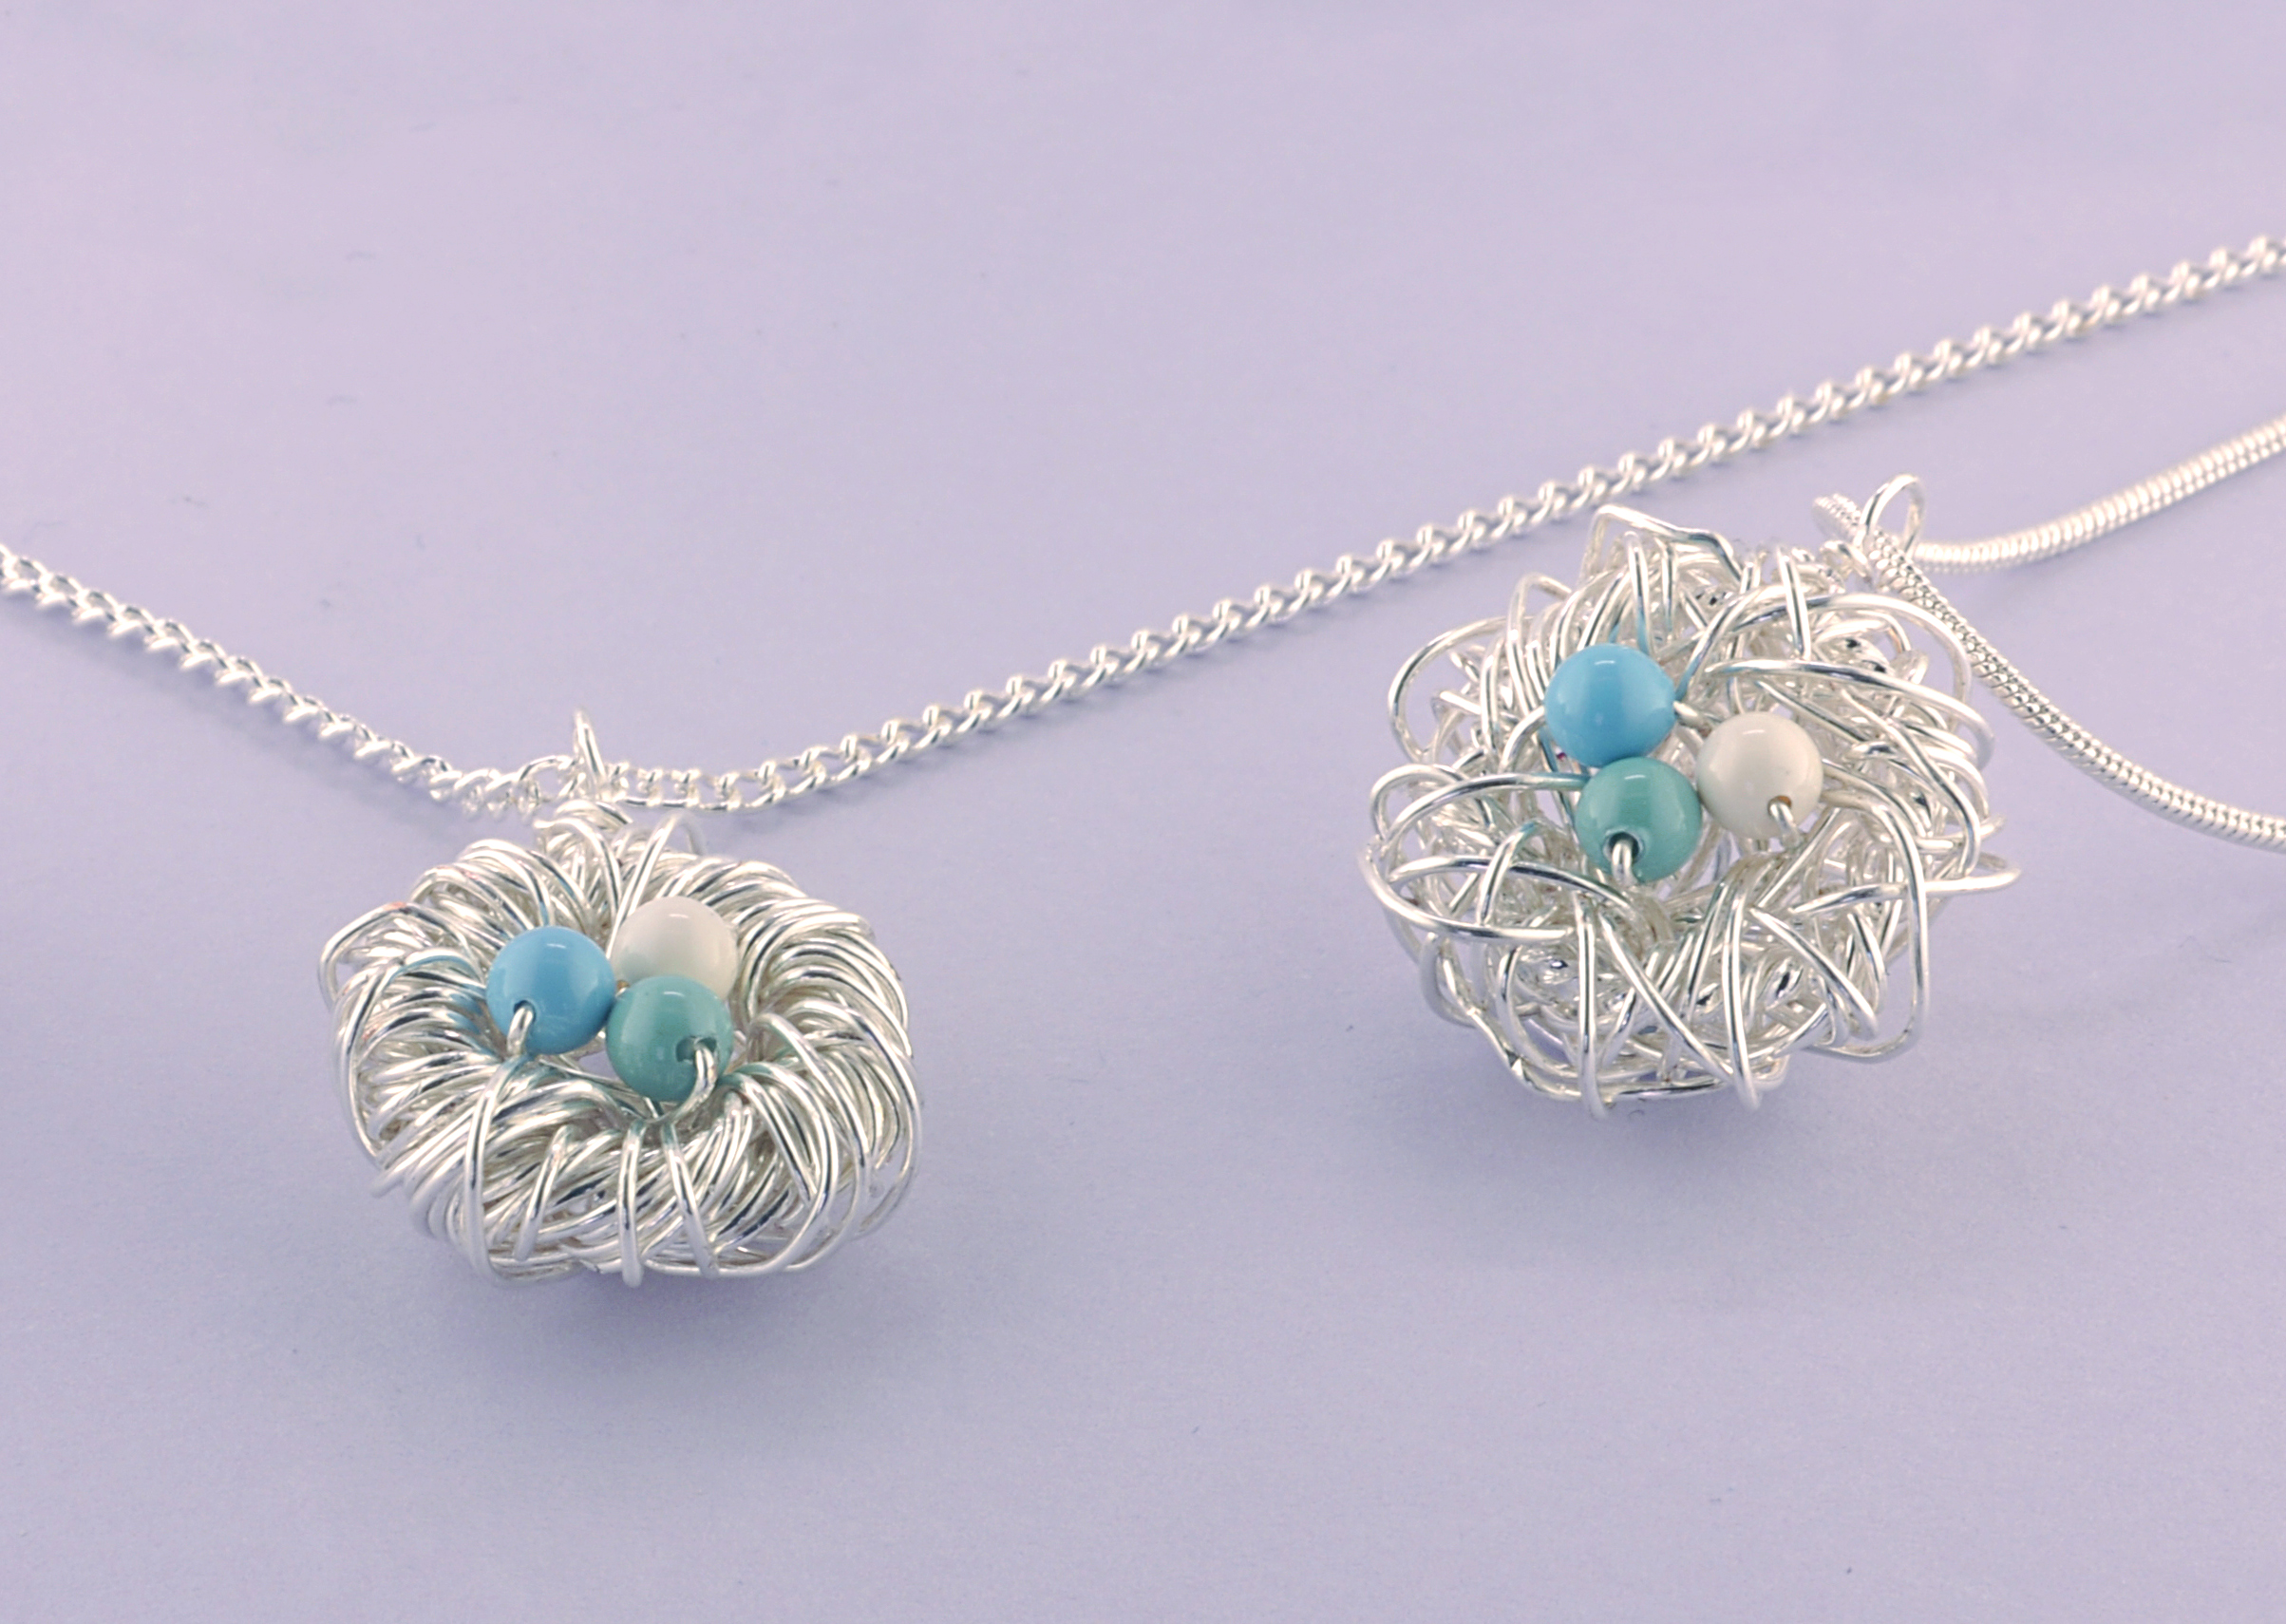
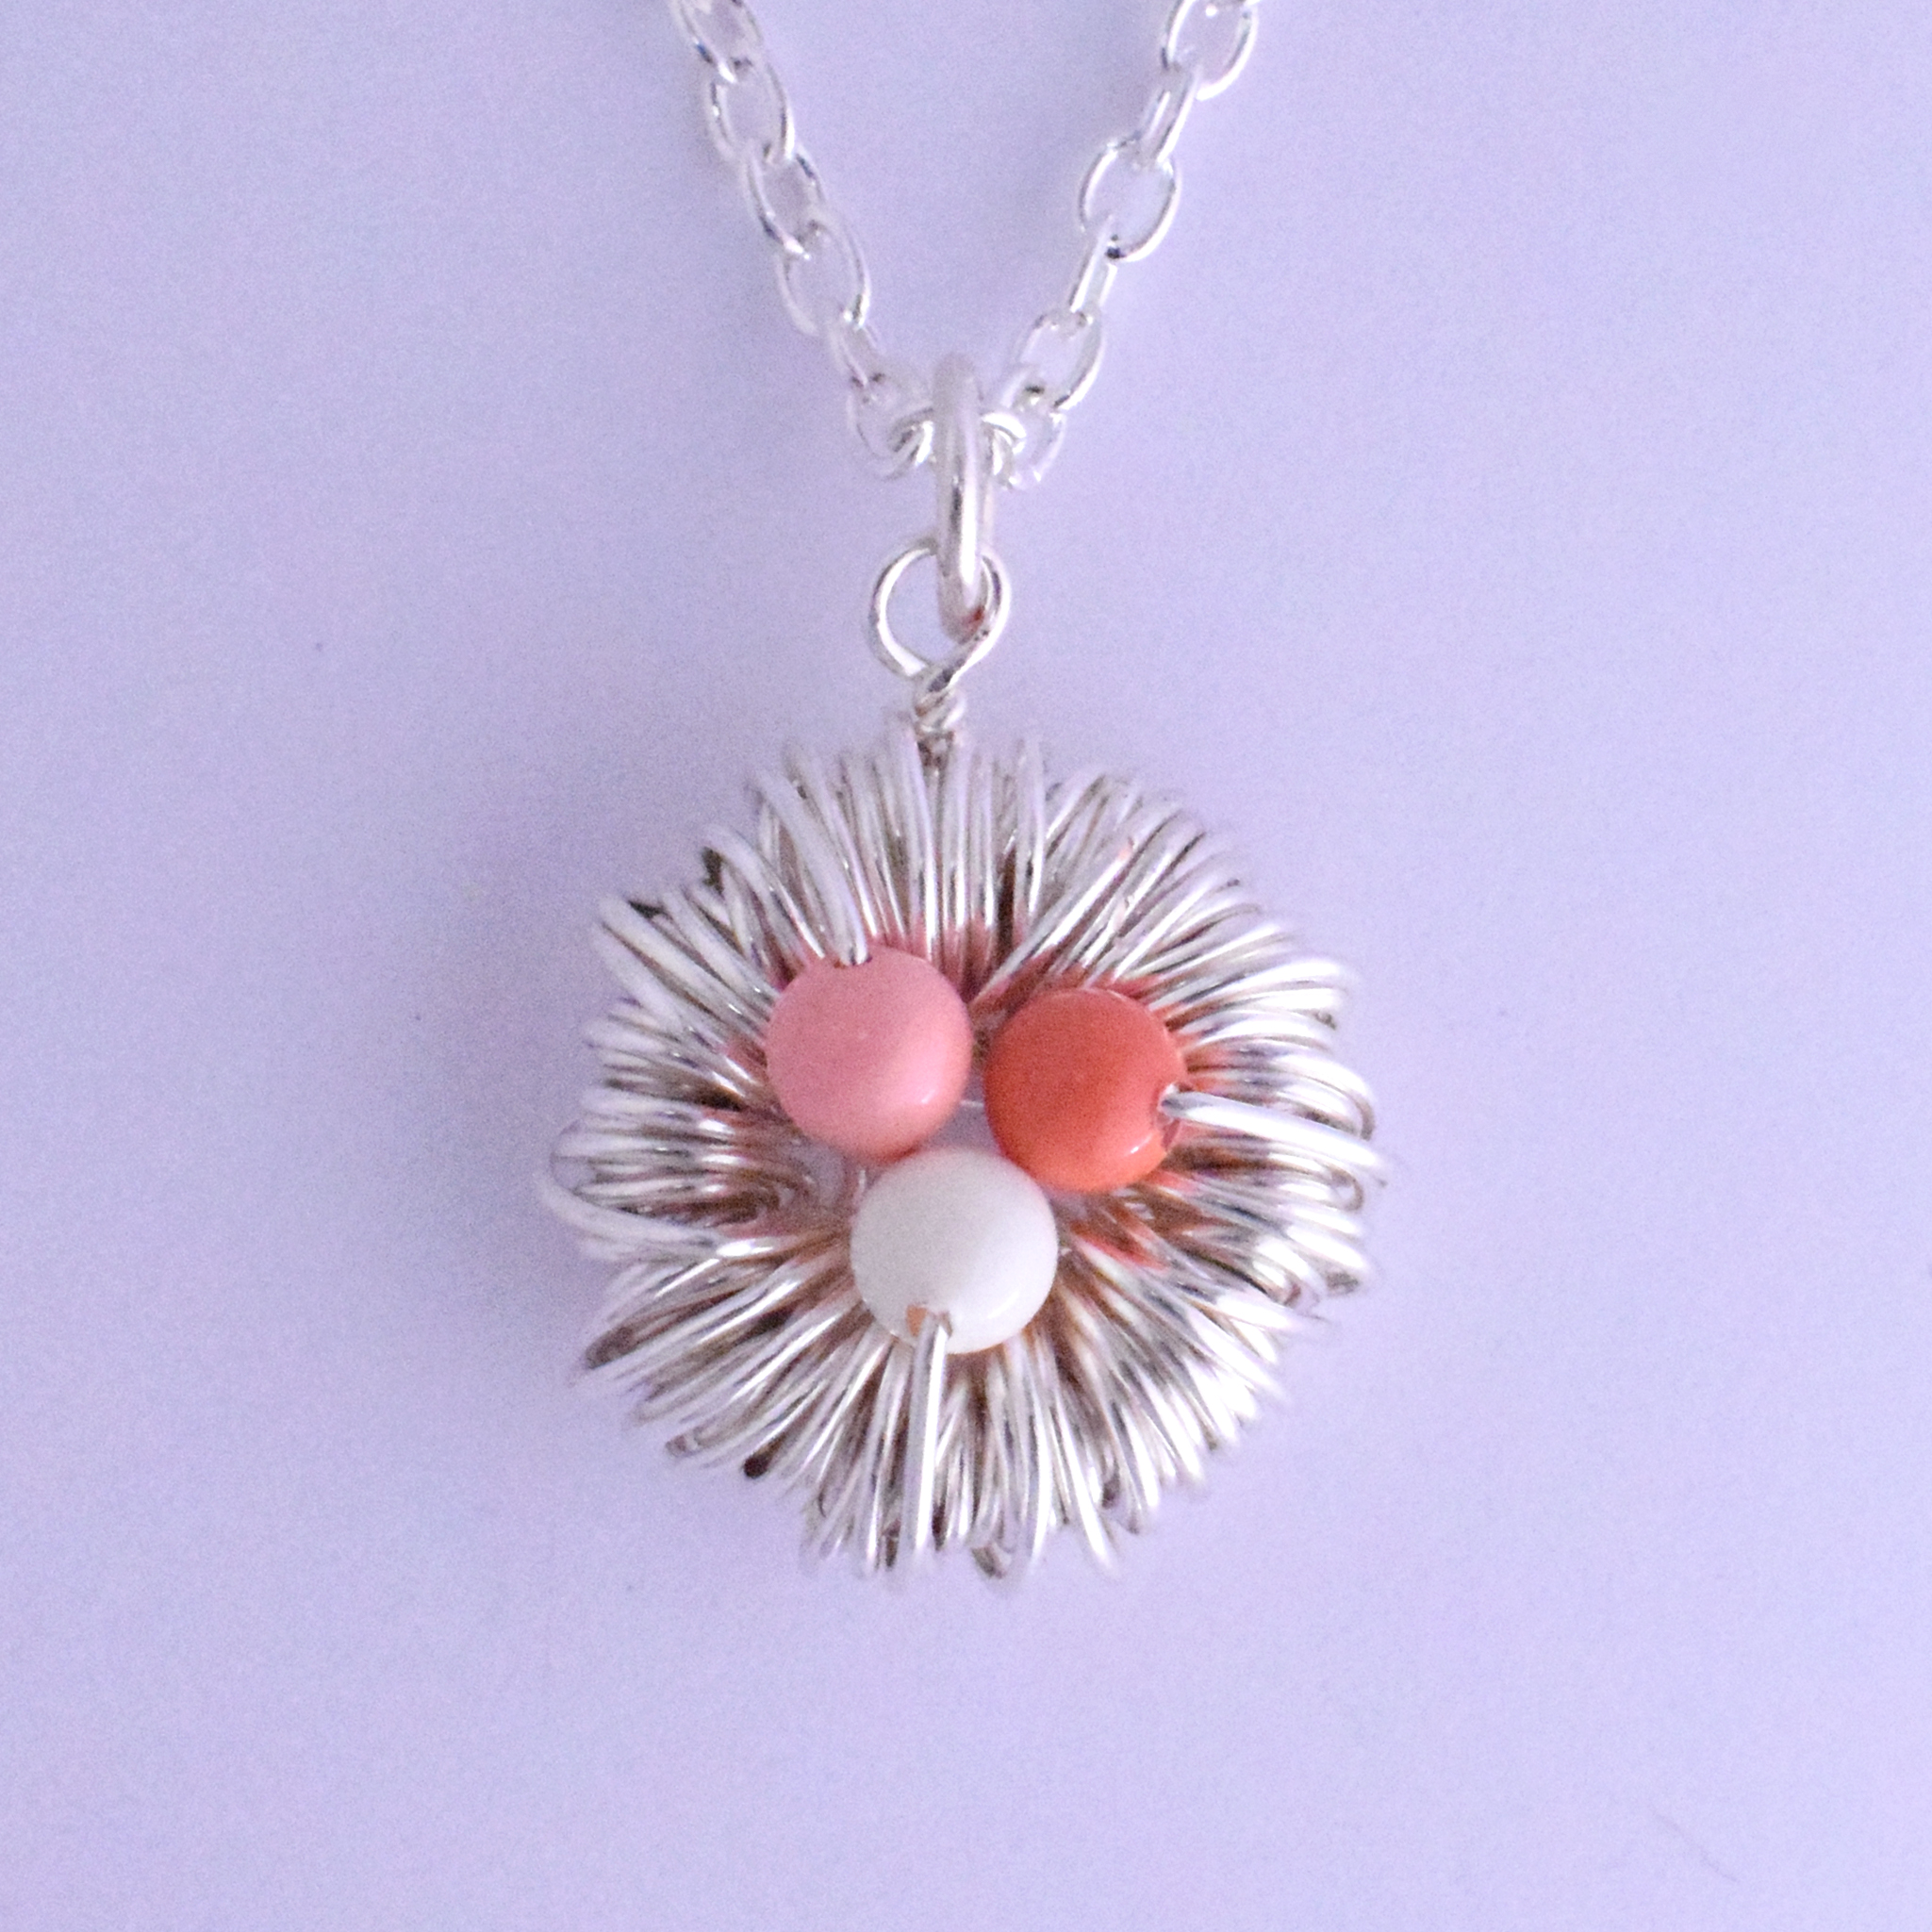
Swarovski Gem Coloured Pearls are ideal for spring jewellery, and you could always choose coral shades for a warmer spring colour palette. Why not make two and turn them into earrings?
We hope you have enjoyed this Wire Birds Nest Jewellery tutorial – Share your makes with us on social media on Facebook and Instagram.