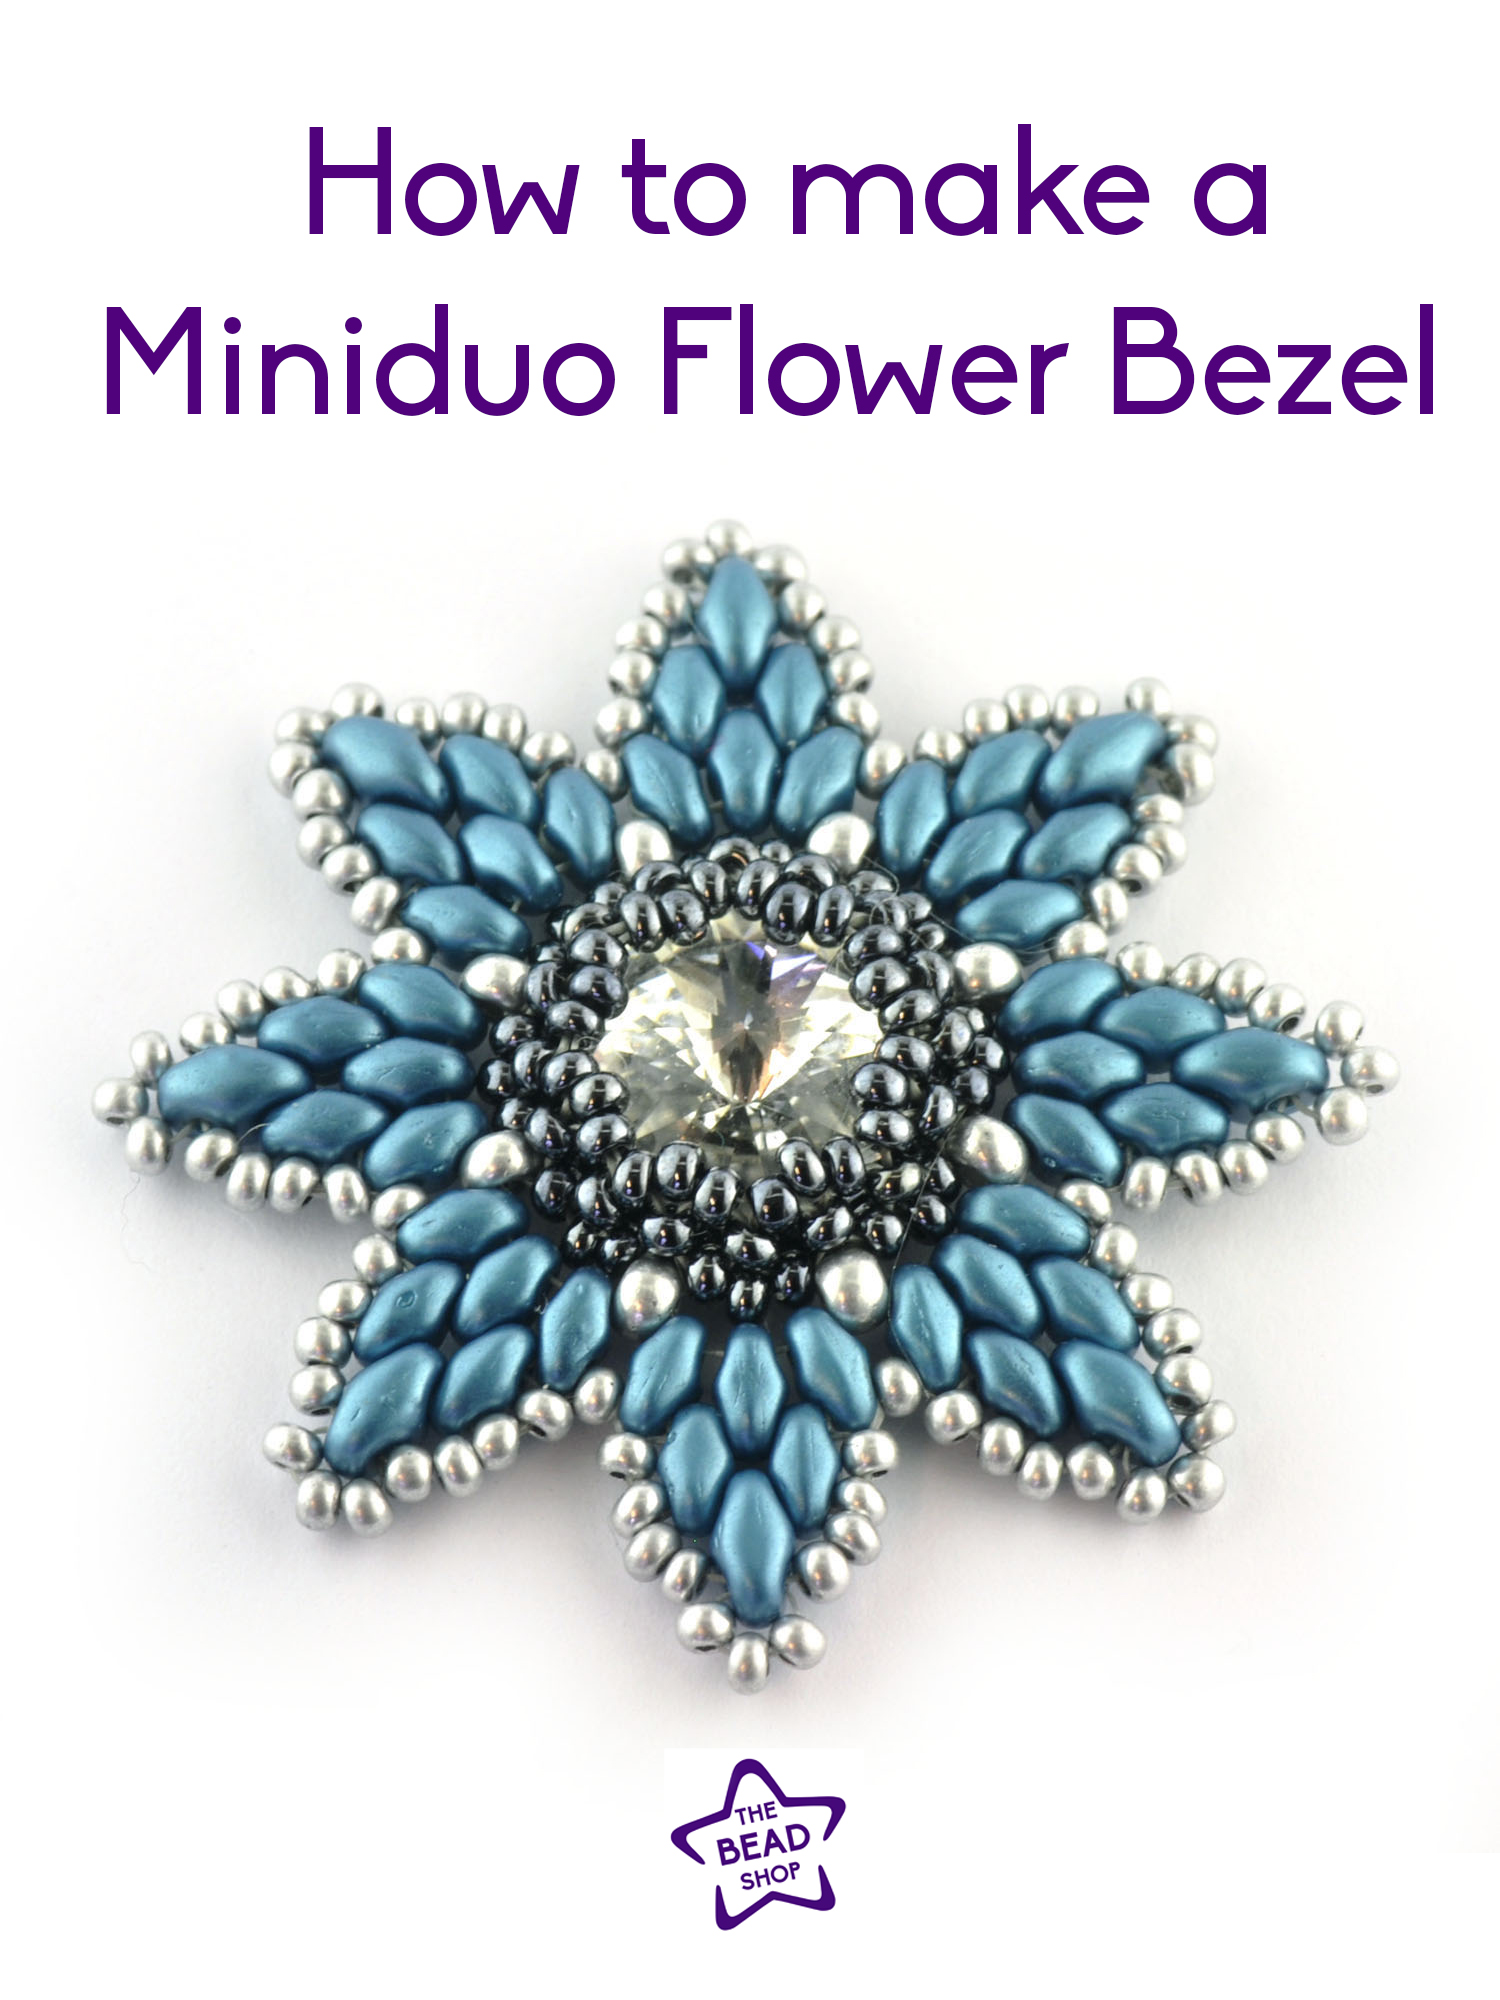
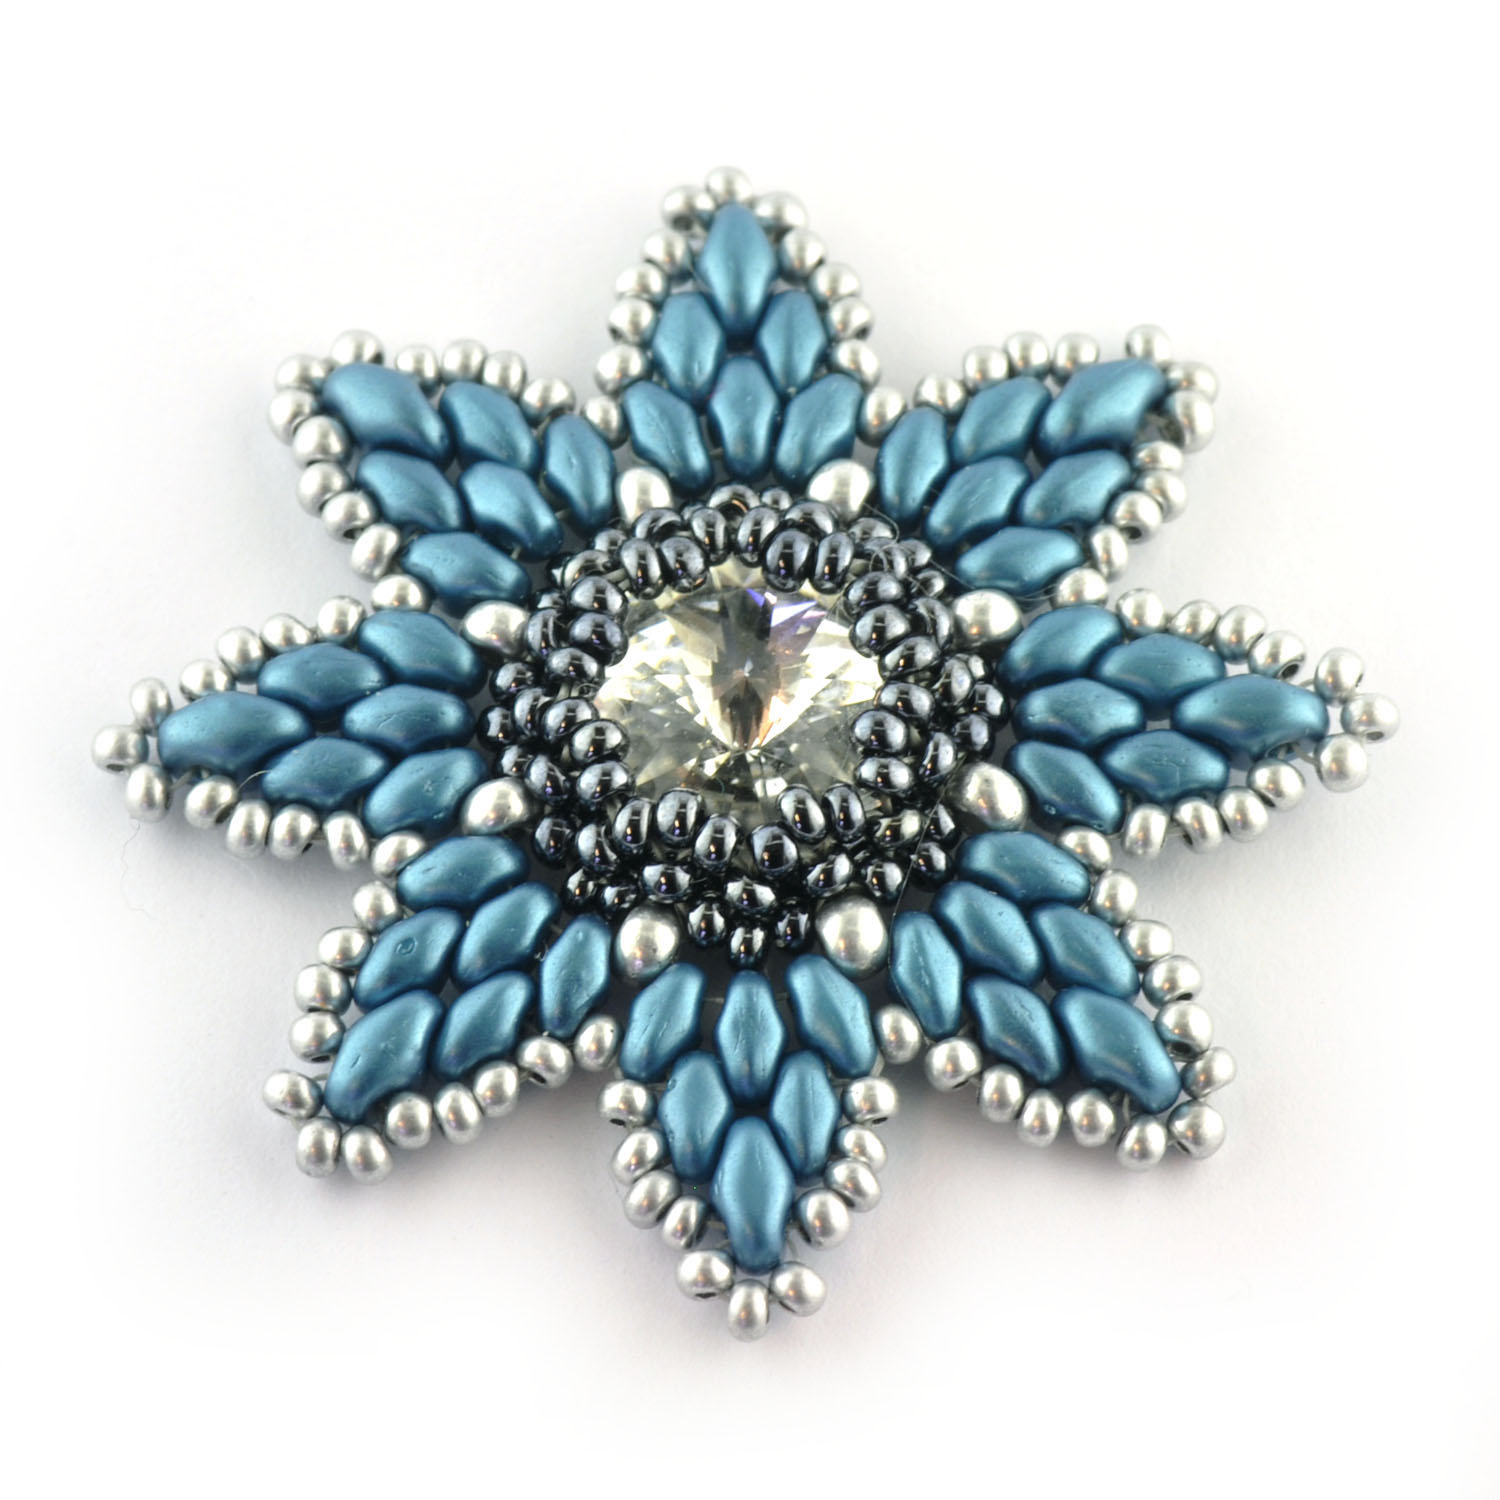
The Miniduo Flower Bezel is a beadwoven design that can be easily turned into a necklace pendant or a brooch. Using Miniduo 2 hole beads, Czech seed beads and a Swarovski Rivoli, this a is a great intermediate bead-weaving project.
The beaded bezel around the rivoli is created using right angle weave (RAW) and size 11 seed beads, then the petals are built up from the outside of the bezel using Miniduo beads. Tension is crucial to keeping the stone in place, so taking a little more time and care will give you neat results.
Tools and Materials
- 1 x 12mm Swarovski Elements 1122 Rivoli stone or 12mm Preciosa Rivoli
- Miniduo beads (48 beads)
- Size 11 Czech Glass seed beads
- Size 8 Czech Glass seed beads (just 8)
- Nymo beading thread
- Size 10 beading needle
How to make a Miniduo Flower Bezel
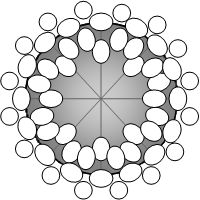
1.Cut a long length of Nymo and thread your needle. Pick up 4 x size 11 seed beads and, leaving a long 20cm tail, thread back through the first 2 seed beads again in the same direction, creating a square of beads, when pulled up.

2.Pick up 3 new seed beads and anchor through the bead that the thread is exiting, in the same direction, creating another square of beads, thread through the next two beads that have just been added so that your thread is exiting out of the bead at the end, ready to add more beads. Pick up another 3 new beads and in the same way anchor through the bead you started from and thread through the next 2 beads to be in the correct place to continue. Carry on in this way until you have a row of 15 small squares (46 beads in total).

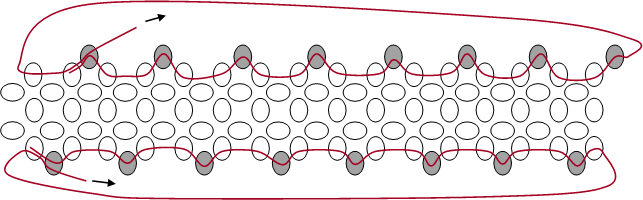
3.We need to turn the row of beads into a tube to fit around the rivoli; pick up 1 new seed bead, thread through the first bead from the beginning of the row (it may help to keep your beading flat like the diagram so the beading doesn’t twist and it’s easier to see). Pick up another new bead and thread through the bead at the opposite end, in the same direction as the thread exiting it, where you started from. This will form the tube and the first row of the bezel.

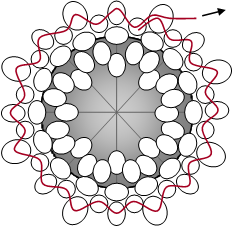
4.Adding a new row; (note I have kept the beading flat on the diagram to make it easier to see). Make sure you’re exiting through an edge bead, then pick up 3 new beads and anchor through the bead you started from in the same direction. Then thread through the next bead ready to continue. Pick up 2 new beads and anchor through the next edge bead and the bead you started from (which also made up part of the previous square), thread through the next two beads in this same square, as well as the next edge bead to be in the right place for the next square. Continue adding squares until you’ve completed the second row. At the end of the row only 1 bead is needed to complete the final square.


5.Make sure you’re exiting from an edge bead, pick up 1 new seed bead, then thread through two edge beads, pick up a new bead, go through the next two edge beads and so on, all along the edge. Once you’ve added 8 new beads, thread through the final two edge beads and the first of the new beads added. Remove the needle from the thread and thread it on the tail thread and repeat for the opposite edge, started one bead over .
6.Fitting the rivoli; hold the rivoli inside the tube and pull the threads up on each side, this is a little fiddly, the stone should stay in place. Tie off one thread by taking the needle under the thread in between the two beads where the thread is exiting, pull the thread until you have a small loop and pass the needle through it, pull tight tying a knot around the existing thread, be sure to keep the tension tight when doing this. Repeat with the other end of the thread. The bezel part is now complete and should look like this diagram.
7.Building up the petals – first row; weave the longest thread to the edge of the bezel (now the centre of the right angle weave). Starting with a size 8 seed bead pick up alternate size 11 and size 8 seed beads and anchor them through the edge beads. Finish this row by threading through the first size 8 seed bead added.
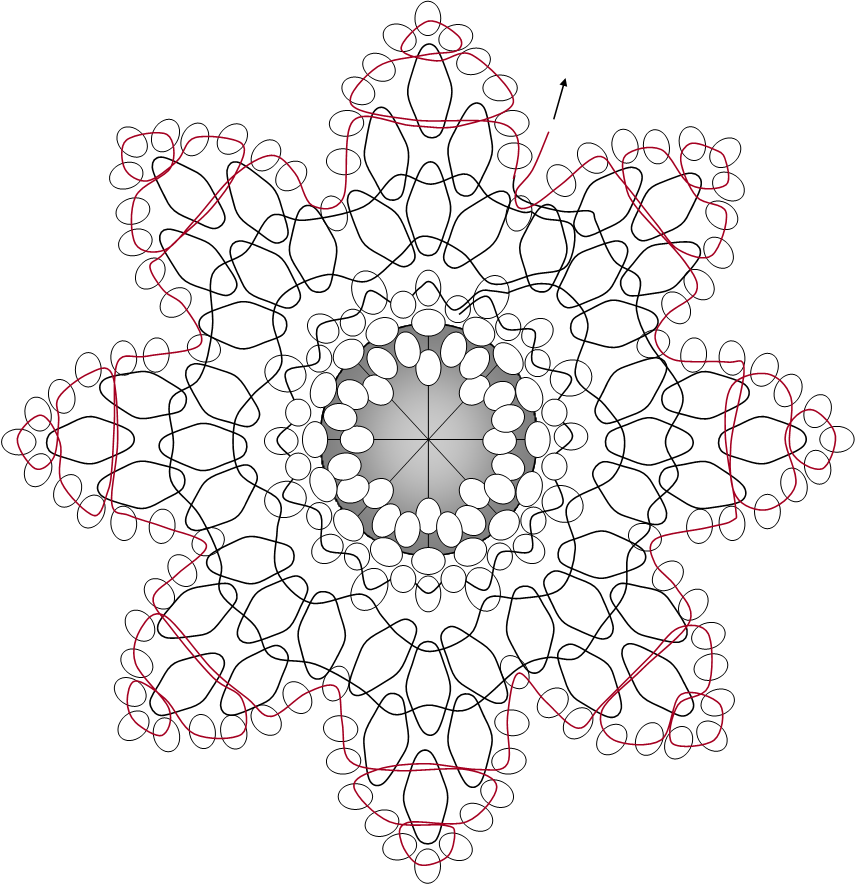
8.Pick up 3 miniduo beads and anchor through the next size 8 seed bead. Continue doing this all the way around the bezel (24 beads in total). To finish the row thread through the size 8 seed bead you started from and the first miniduo bead, take the thread through the other hole in the same miniduo bead, going back on yourself.
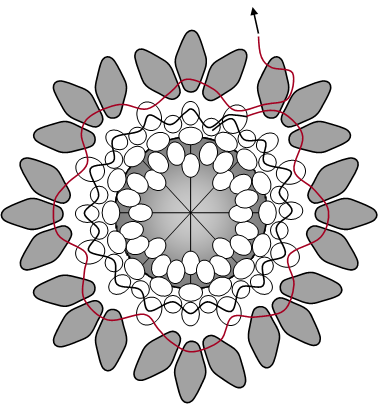
9.Pick up 1 size 11 seed bead, thread through the next miniduo (through the top hole), pick up a new miniduo, thread through the next and pick up another new one, thread through the next and then pick up a new size 11 and repeat all the way around. To finish by going through the first seed bead added.
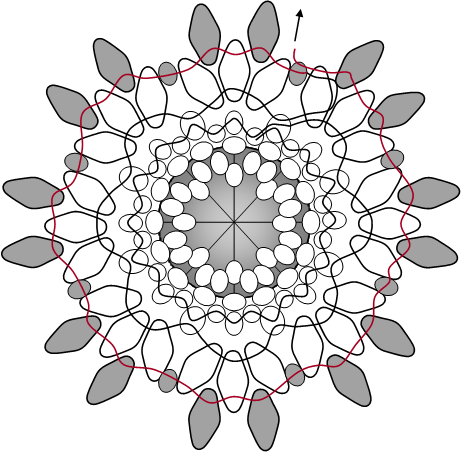
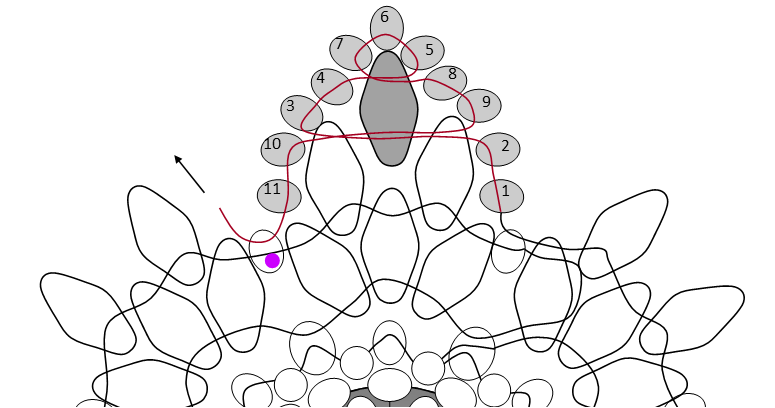
10.Pick up 2 size 11 seed beads (1 & 2) and thread through the second hole of the miniduo added in the previous row (just above where you are), pick up a new mini duo and thread through the next miniduo. Pick up two more seed beads (3 & 4), thread through the top hole of the new miniduo and pick up 3 new seed beads (5, 6 & 7). Anchor the new beads by going through the same hole in the top of the miniduo in the same direction, so that they sit on top of the bead. Pick up 2 new beads (8 & 9) and thread through all 3 of the miniduos lined up in middle of the petal. Add two more new seed beads and thread through the size 11 seed beads at the start of the next petal (marked with a pink dot). Repeat this step to complete every petal.
11.Finish off by threading through the last seed bead in between the petals. Fasten off the thread by knotting in the same way mentioned in step 6. Weave the end though a few beads and knot again, thread through several ore bead before trimming off the end. You can use the other end of thread to attach a jump ring or brooch back dependant on how you want to wear or display your finished flower.