We wanted to share a free project with you this Valentines. We’ve had grey and miserable start to the year so we can all benefit from something cheerful. Which is why we’ve created the Spread a Little Love – Peyote Stitch Bracelet Project. A perfect project to spend a relaxing evening beading.
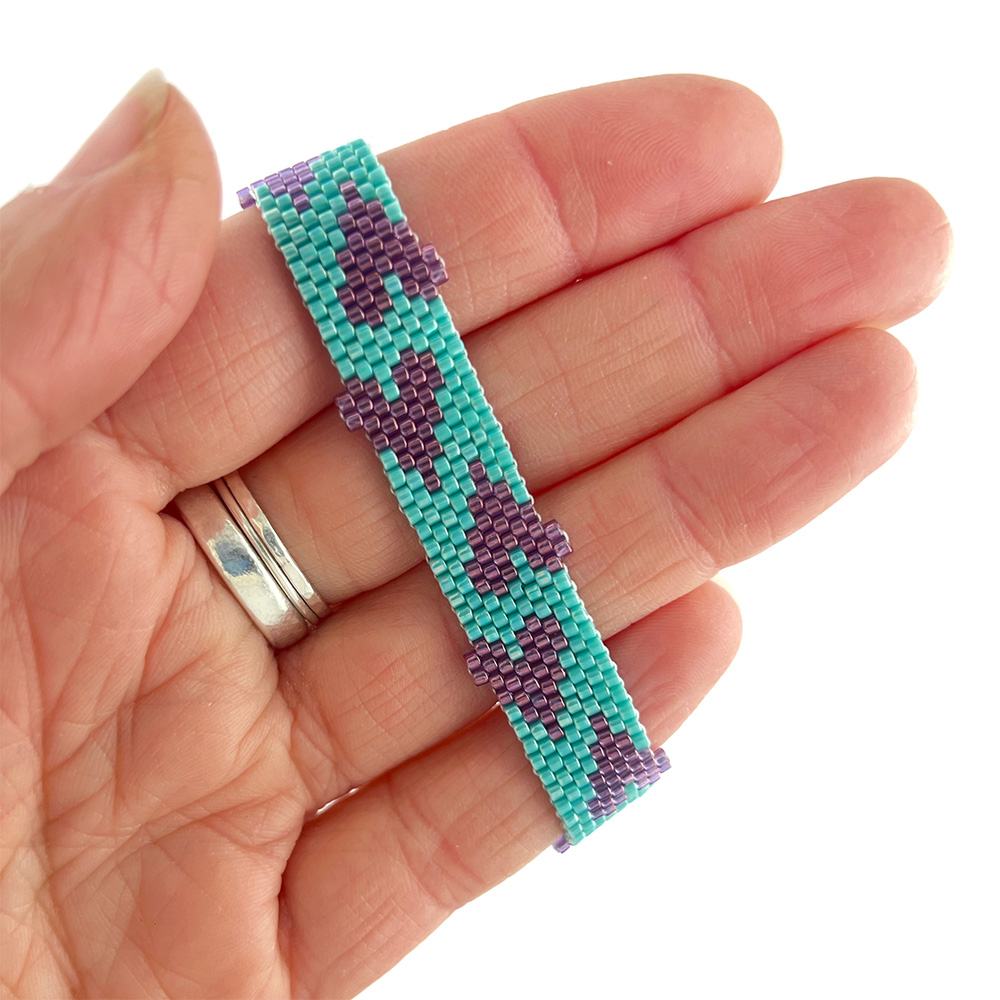
This is a straightforward even count Peyote stitch pattern with a little design flourish. A small bead increase at the edge of each heart gives them the illusion of overlaping the edge of the bracelet. This is a great way to add a new technique to your beading repertoire and give your bracelet more interest.
What you need
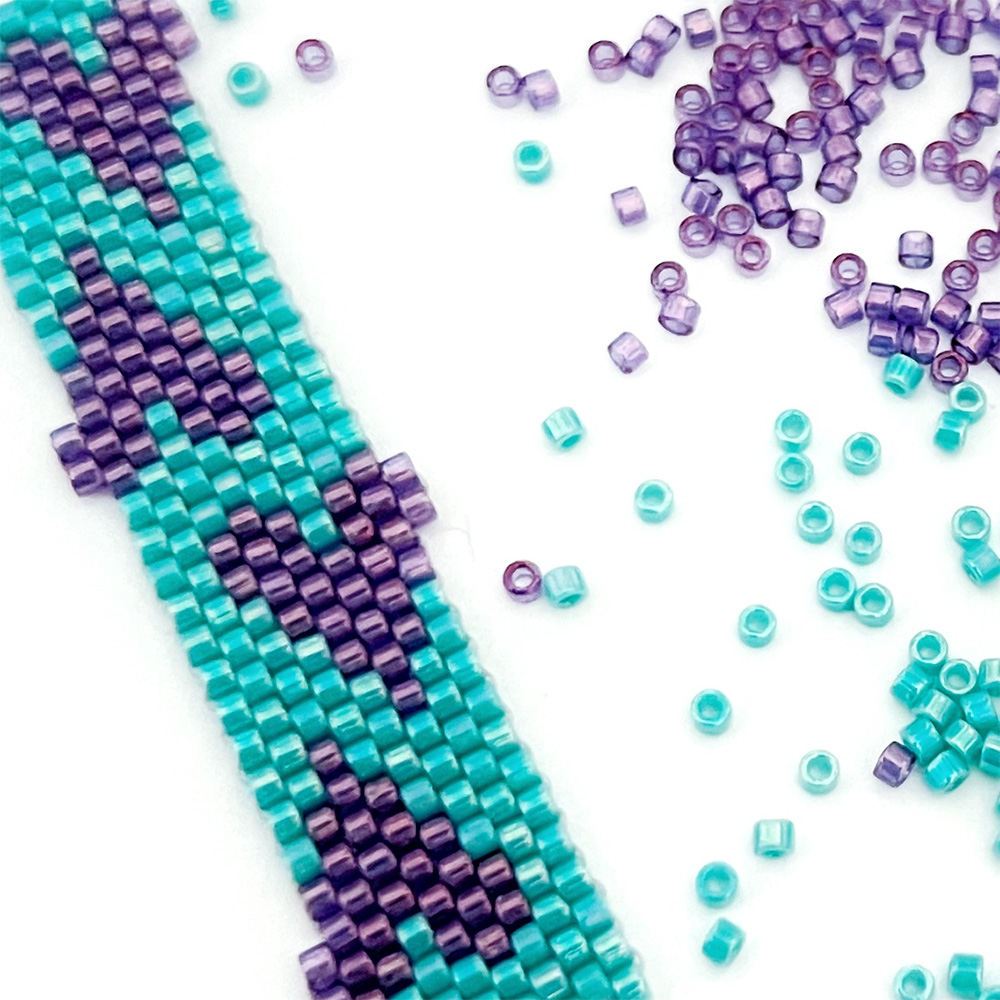
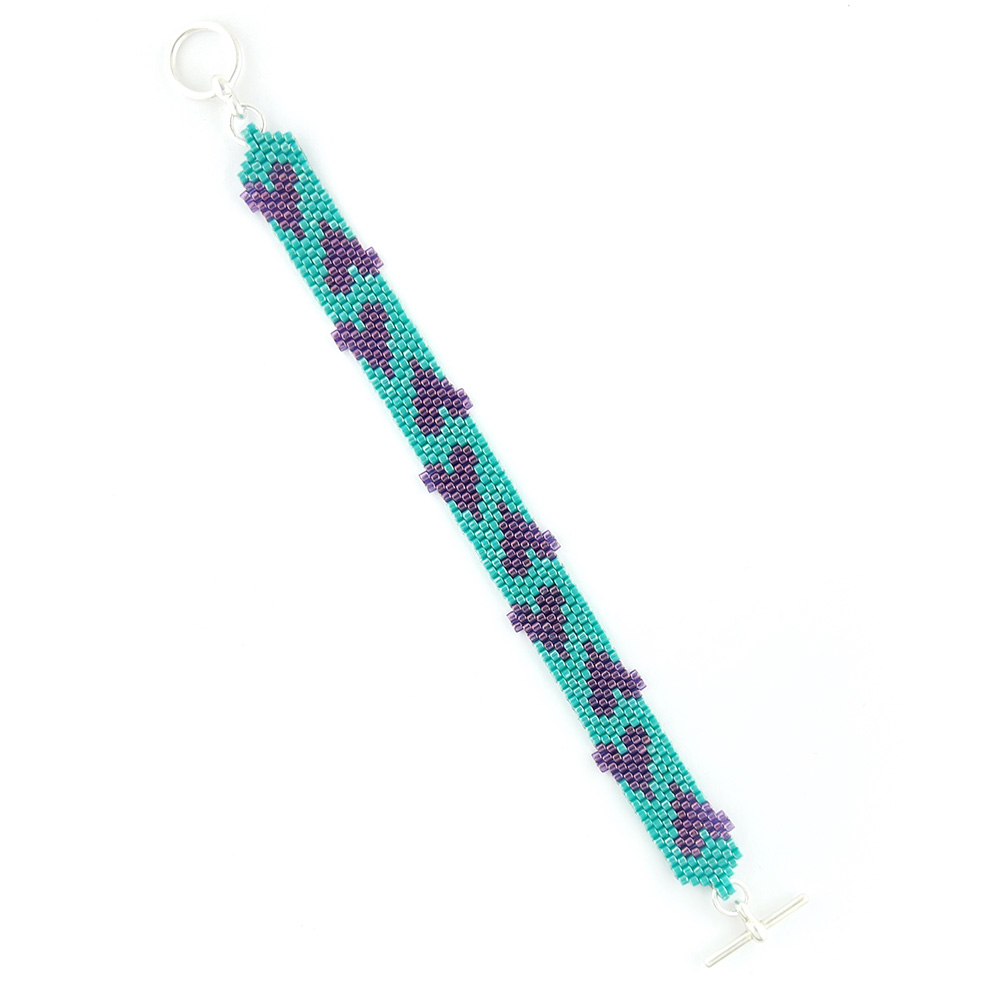
To make your bracelet you’ll need at least 2 contrasting colours for Size 11 Miyuki Delica Beads. However you can use as many colours as you like. Our Delica bead Mixes are perfect for a project like this. They have a complimentary selection of beads already collected together. You’ll just have to decide on your back ground colour. For my sample bracelet I chose DB166 Opaque Turquoise AB for my back ground. And DB117 Gold Lustre Lavender Blue for my hearts.
Beading thread and a beading needle; I’ve used Miyuki Beading thread in blue and a size 10 beading needle.
A clasp of your choice; I’ve used a Toggle Clasp with 2 x 6mm jump rings
You’ll also find a bead mat useful and sharp scissors.
Getting started
If you’re new to Peyote Stitch we have a great YouTube Video to help you get started:
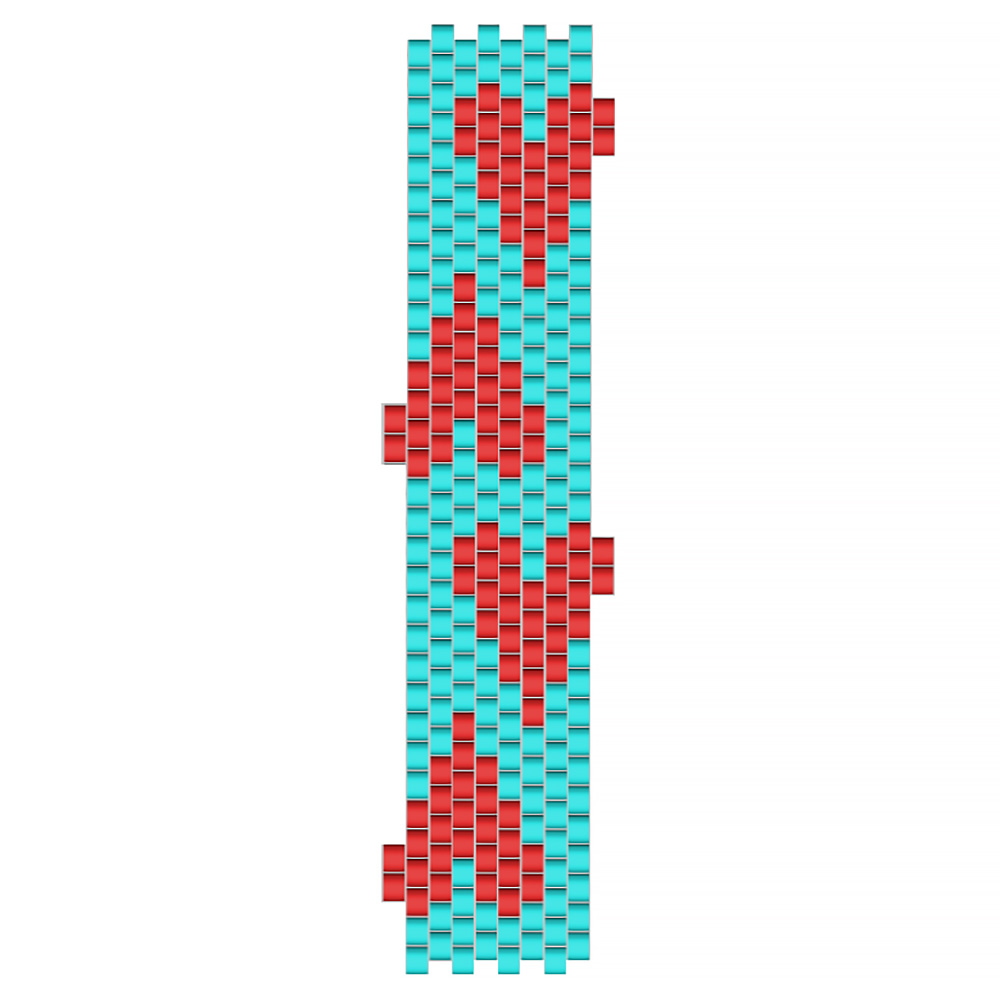
To start off the bracelet you’ll leave a 20 – 30cm tail which you’ll use to add a clasp later. Start beading back and forth across the design and pause when you reach the increase (explained below). If you’re already familiar with increasing in Peyote Stitch you can use the diagram to create your bracelet. Once you reach the end of the pattern chart below, start again and keep repeating until you reach your desired length.
Adding the Increase
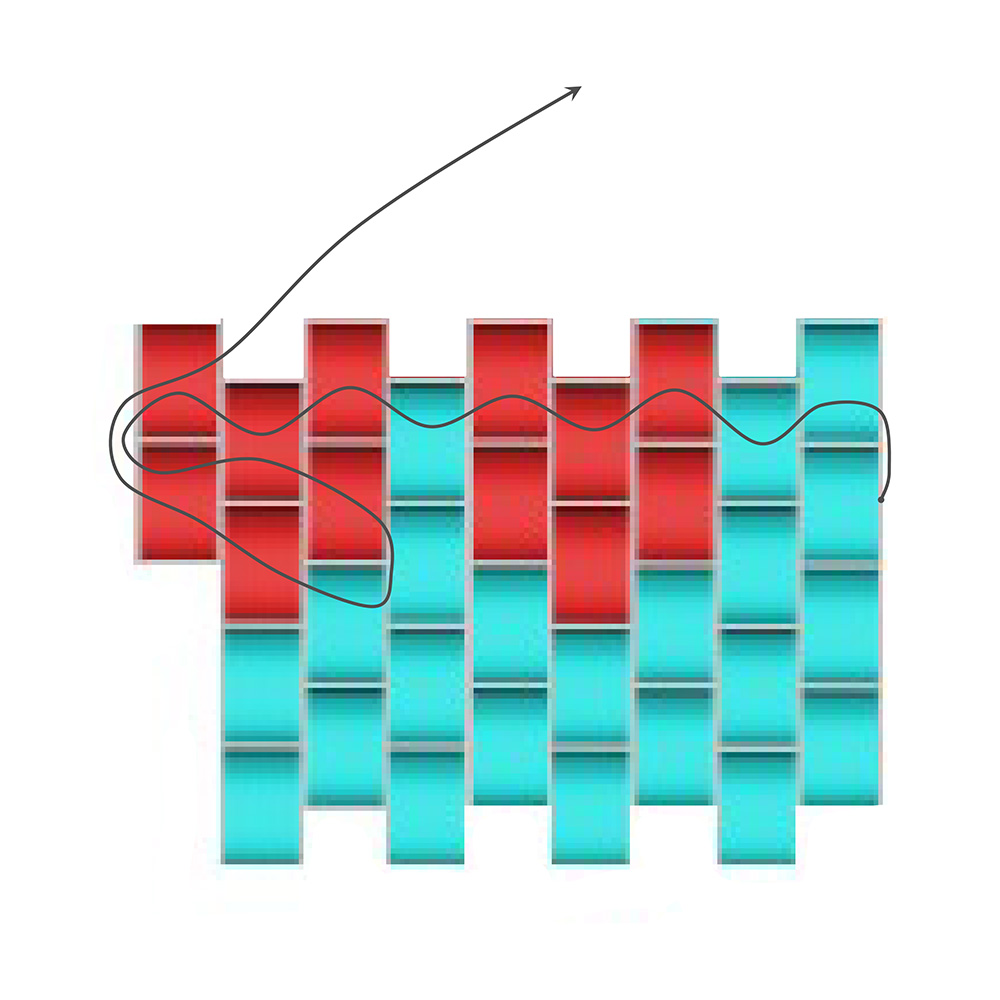
To add the two extra beads at the side of each heart, to give that overlapping illusion, you have to add and secure 2 beads at each side. You will actually add them at the end the row after the one you think it’ll be. Trust the process here, this diagram shows the thread path you’ll take to add and secure the beads in place (working from right to left in this example, ending your thread when you need to start the next row. Essentially adding a little turn within the beads;
Finishing your Bracelet
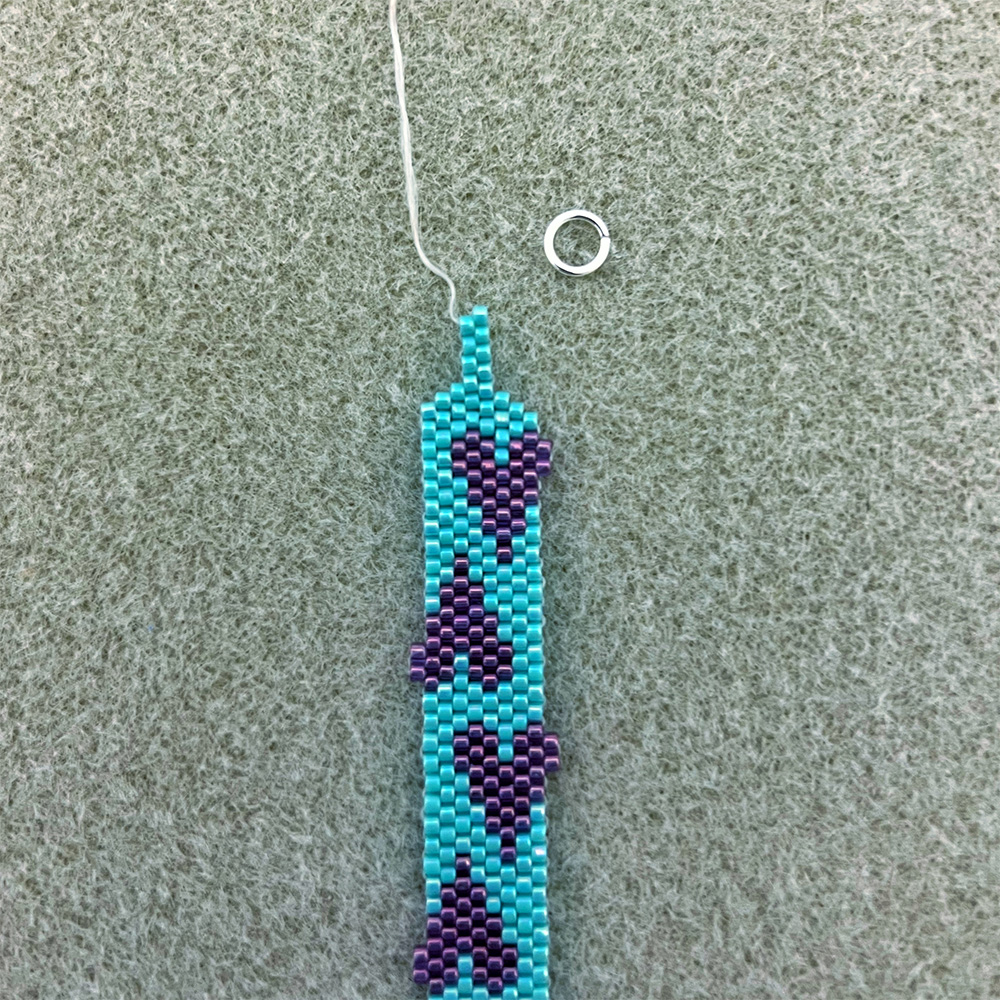
Depending on the clasp you choose to finish your bracelet, you’ll need to allow a little space at the end to attach it. I decreased my bead work at the end and created a short tab of beading which I stitched down in place to create a tube, or loop. I then threaded a 6mm jump ring through the loop to attach my clasp. I repeated this at the other end of the bracelet.
Weave in your thread ends to complete your bracelet.
You could adapt this pattern to create a bookmark, choker or phone strap. It’ll look completely different again in bold different coloured hearts and a black background too.
Happy Beading! If you make one of our free projct please do share them with us and tag us on Social Media so we can see all your lovely work.