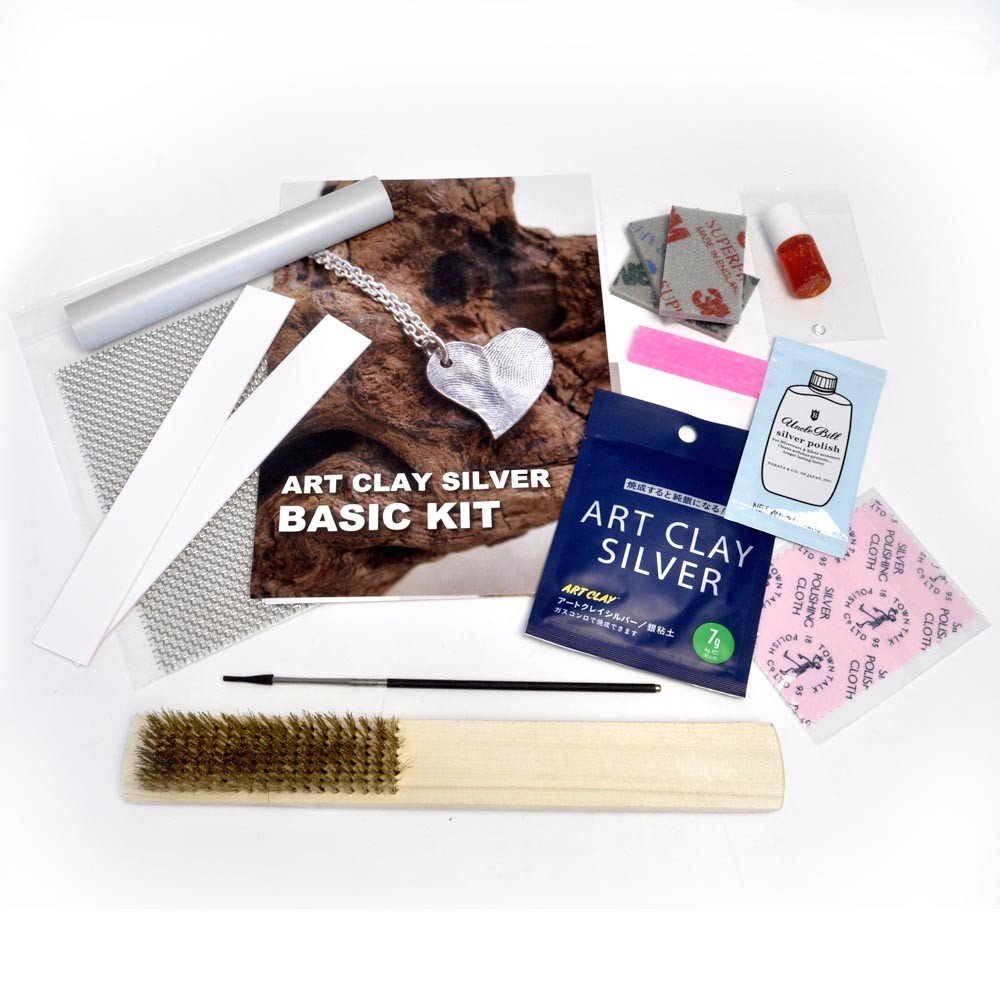
This simple art clay jewellery project is ideal for beginners and is a great first step when you have bought our Art Clay Beginner Kit.
Getting Started with Art Clay
Work on a non-stick surface such as a spare bathroom tile, or a laminated sheet of paper to protect your working area. Whenever you work with Silver Clay it is a good idea to plan out what you want to do before you start. As soon as you start handling the clay (especially if you have hot hands or it’s warm weather) it will start to gradually dry out. Handling it as little as possible will prevent this. In addition to the tools and materials included in our beginner kit, there are a few other useful, inexpensive items that are helpful which I’ll mention along the way.
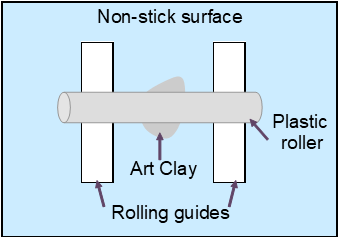
1.Remove your 7g of silver art clay from it’s packaging and roll it out on your surface between the rolling guides using the roller from the kit, this will make the rolled out clay all a consistent thickness.
TIP: To prevent your clay sticking to the roller use a small amount of olive oil based balm to rub over the surfaces – a little goes a long way (badger balm, or baby balm – Vaseline can’t be used with the clay).
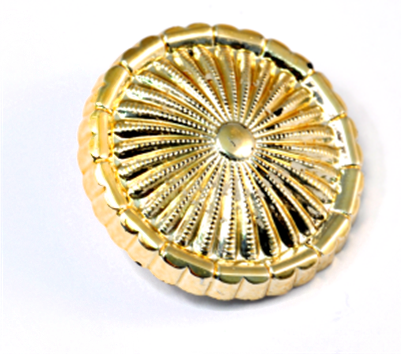
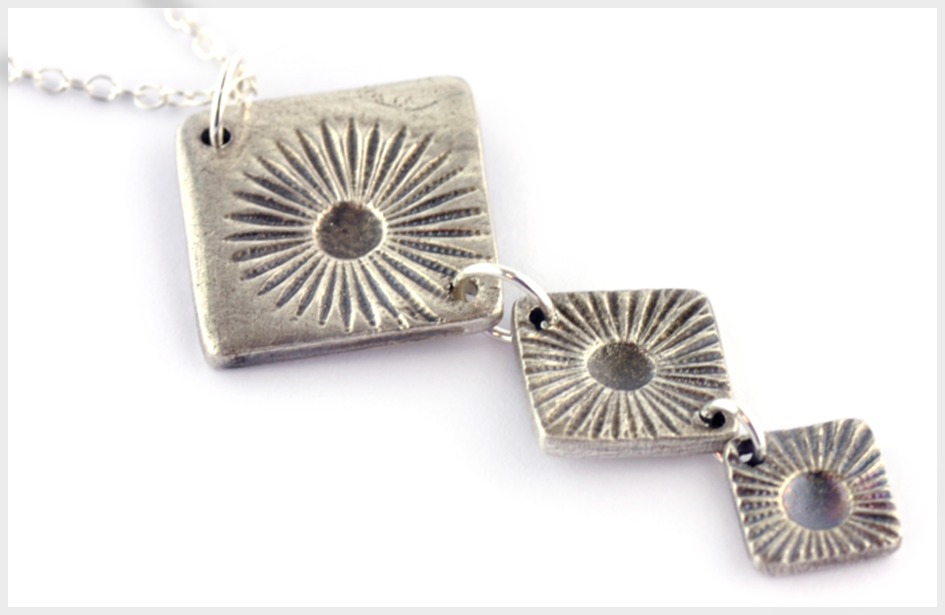
2.Imprint a texture on to the surface of the clay – I used an old plastic button, which had an effective raised design. You can use all sorts of items to create texture; loose weave fabrics, lace, rubber stamps, charms, leaves etc. Rub a little of the balm on to the surface of the button (or other item) and press firmly into the clay, use a square cutter to frame the part of the design you want and cut it out. If you don’t have cutters you can use a tissue blade or craft knife to cut out the shapes.
3.Cut out two more textured squares, each a little smaller than the previous. I made the largest square 14mm x 14mm, the medium square 9mm x 9mm and the smallest square 7mm x 7mm. Make small holes in the clay pieces using the pointed end of the burnisher from the kit (be careful as it is quite sharp). In the large & medium squares you need two holes each in opposite corners and the smallest one just needs a hole in one corner so that the pendants will hang in a line.
4.Dry your squares by either leaving over night, or you can speed up the drying process by using a heat gun or hair dryer. Just take care as the clay can get quite hot if using external heat. Use the sanding pads from the kit on any rough bits, like the edges of the squares and the back. Be careful not to sand over the textured surface as you will lose the definition.
TIP: Remove any stubborn marks like finger prints on the surface of the clay, or it looks a little dry, with a baby wipe. Cheaper the better – fragrance & soap free – they work wonders. Just gently smooth over the surface, again, avoiding the textured surface.
5.Once you are happy with your pieces and they are completely dry it is time to fire them. You can use your gas hob at home – the starter kit includes instructions and the equipment you need to fire over a gas hob. or you can fire in a kiln. Put your pieces in the kiln and set the temperature to 800 degrees and hold that temperature for 5 minutes. You can hire our kiln here at The Bead Shop, contact us for details!
6.Once your items have been fired, dip them in cold water. Use tweezers and drop the items into a bowl of cold water – this immediately cools the silver down and you can pick them up out of the water.
7.The silver looks a little strange after it is fired as the silver will have gone a matte, off white colour. Rub the brass brush from the kit over the surface to take off the whiteness; very quickly you’ll see the silver come through.
Use the sanding pads again to make the sides & backs of the squares nice and shiny. Do not sand over the textured surface. To bring up a high shine rub the burnisher over the surface. On the textured surface it will make any raised bits very shiny and leave indented parts dull, creating a nice contrast.
8. The kit has a small bottle of solution known as liver of sulphur. As the name suggests it has sulphur in it & does smell quite a bit like eggs – so best to have a window open! Put a few drops of the sulphur solution into a cup of water and stir it around a little. Using tweezers, dip your silver into the solution for a few seconds until you see the silver darken. Dry off the solution and polish over the surface with the polishing cloth. This will bring back the shine on the raised surfaces, leaving the indented parts darker.
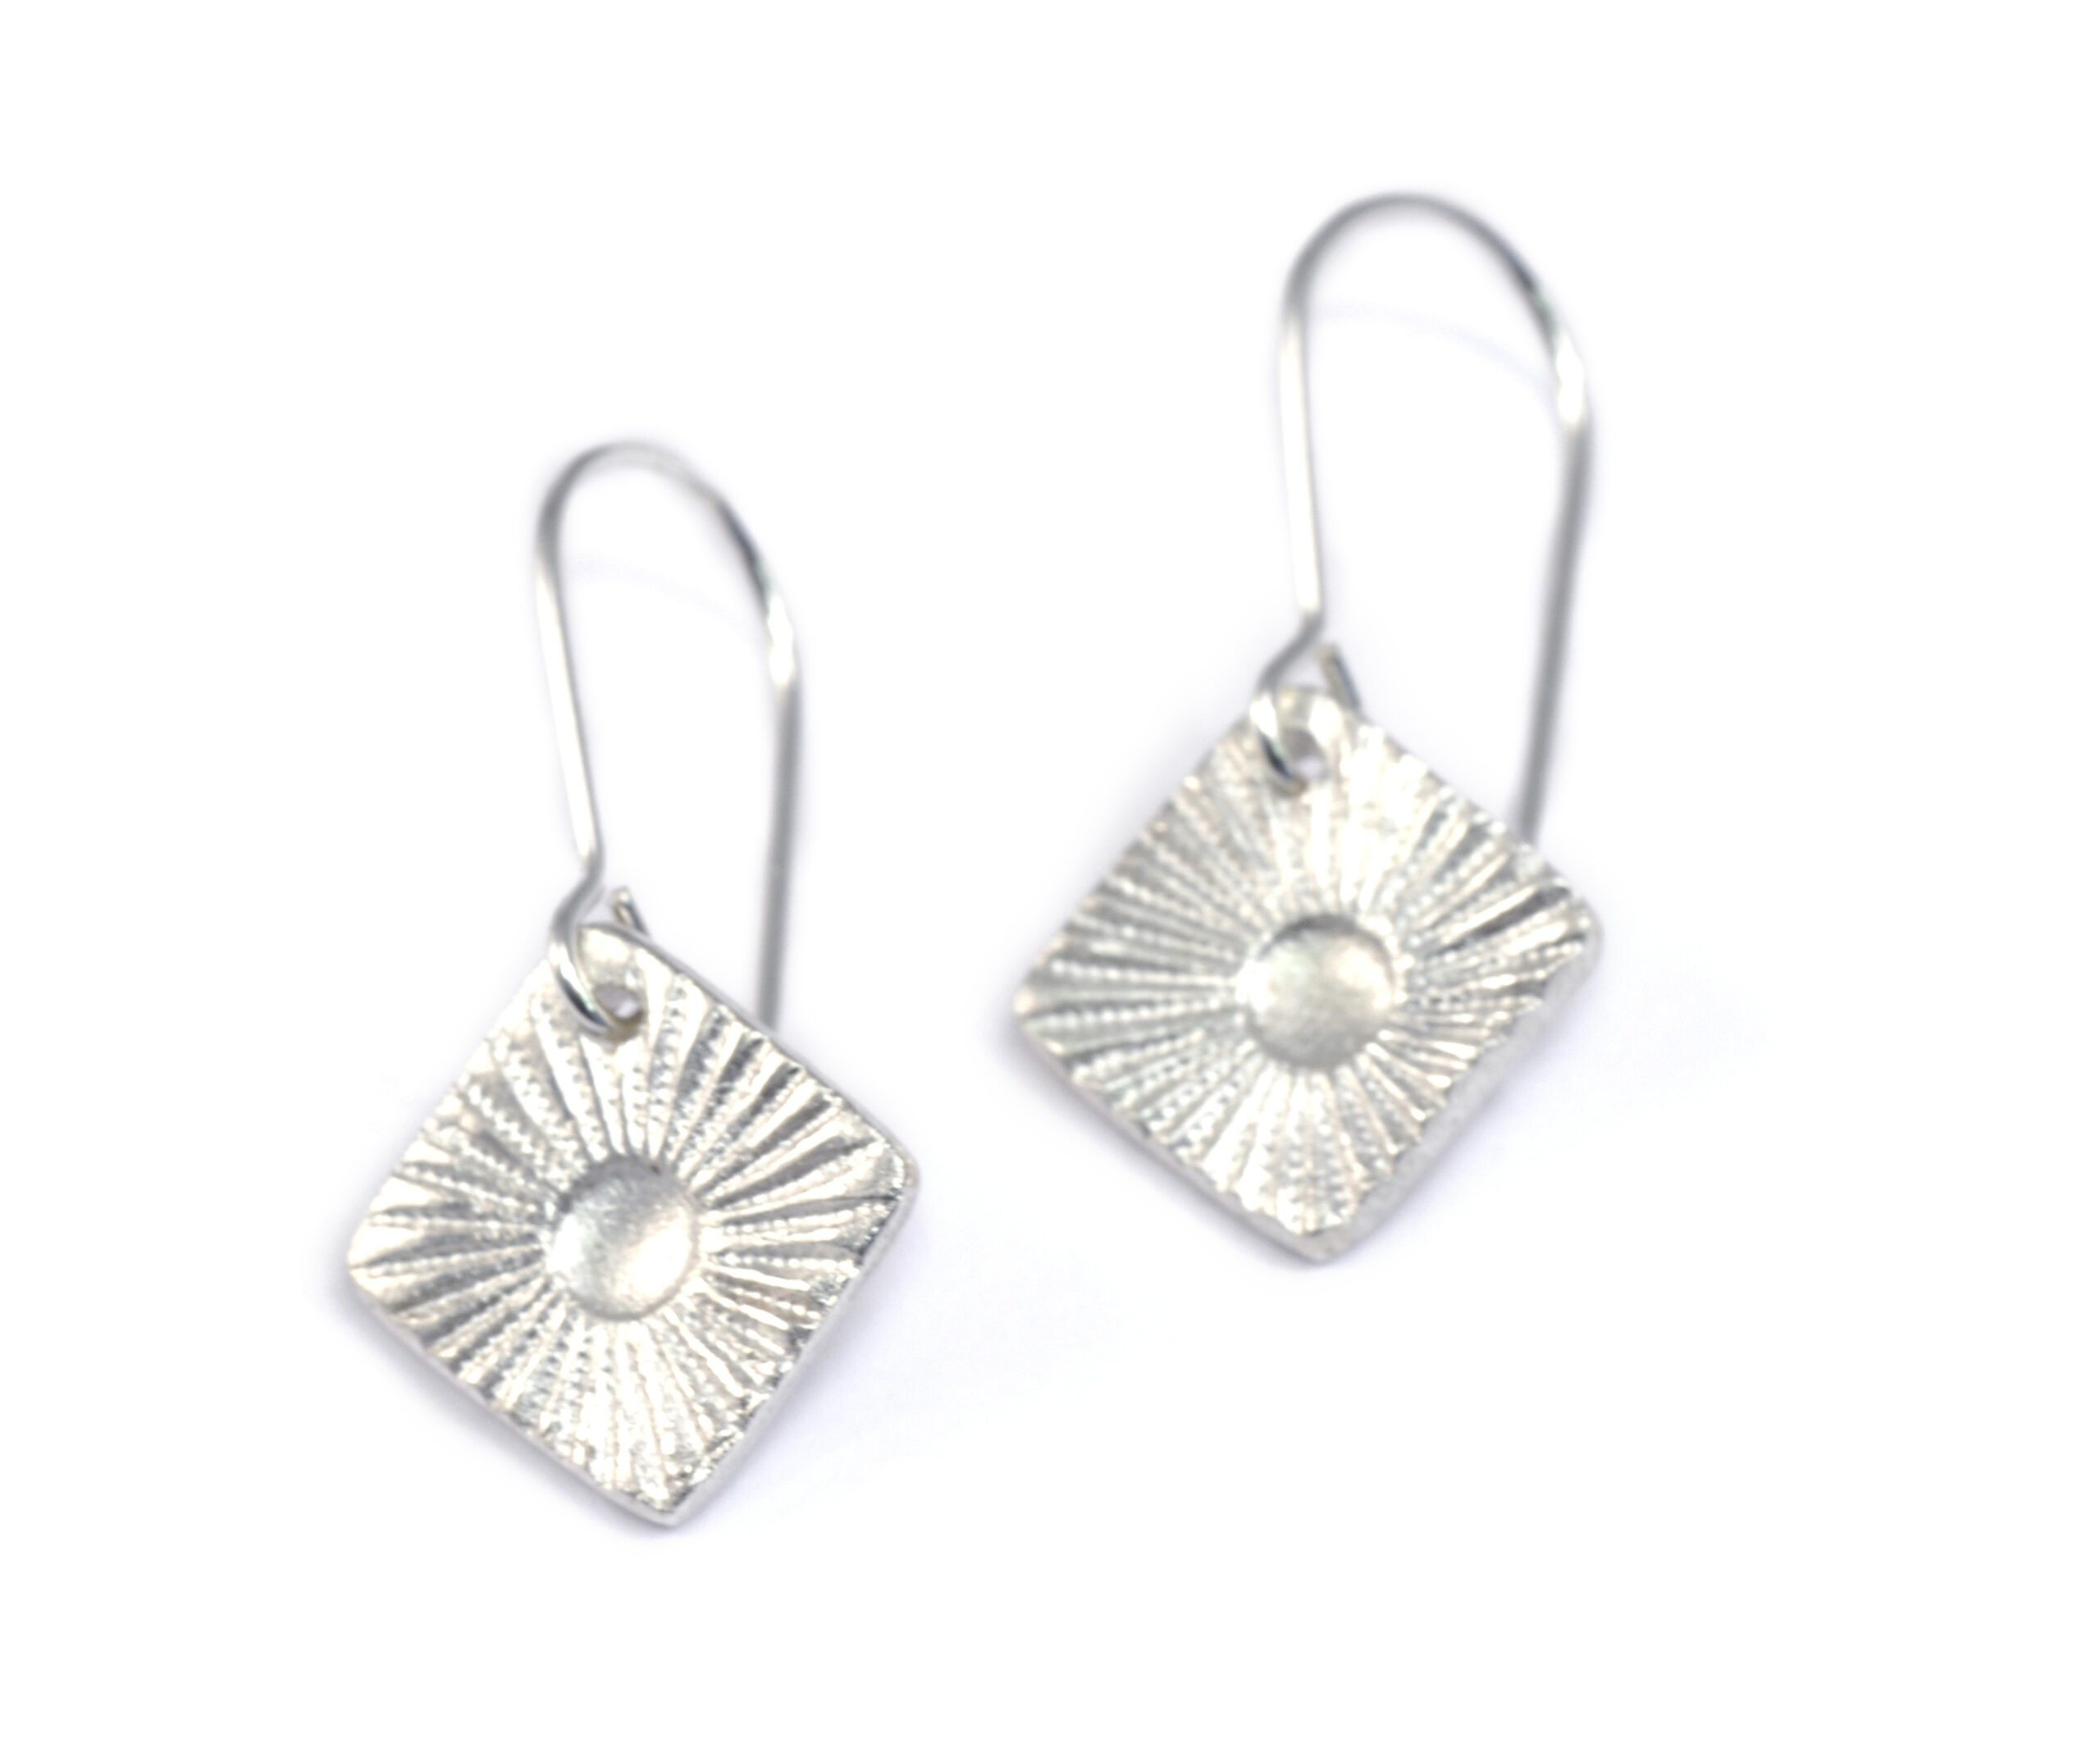
9. There will be just enough of the 7g of clay left to make two more medium sized squares. You can turn these into earrings by attaching sterling silver earwires. I didn’t antique the earrings and you can really see the difference compared to the pendant. The earrings are really bright and shiny, but the design doesn’t stand out quite as much.
We would love to see what simple art clay jewellery you create!